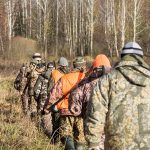
Hunting and the United States is intrinsically connected, throughout our country’s founding, our survival, and our conquering of the frontier. These days it remains a popular and growing sport.
Hunting, through licensing, provides massive amounts of money to conservation efforts around the country.
Hunting itself helps with conservation by reducing species that can easily breed out of control. Hunters and hunting are an important piece of a worldwide conservation effort.
In the following guide, we plan to give you the lowdown on being a hunter in North America.
We are going to cover the weapons used and the different ways you can hunt around the country. We’ll give a rundown on the necessary gear, and then finish with a little information on common game animals throughout the United States.
Before learning more about the hunting and guns, make sure to check out our guides on:
Basic Bullet Sizes, Calibers, and Types
Rifles 101: Common Rifle Types & Actions
Different Shooting Categories
Your weapon of choice is an important consideration. It will dictate when and where you can hunt, as states often break their hunting seasons down by weapon type.
It often follows a similar pattern going bow, muzzleloader, and general gun.
In between, there are separate seasons for duck, turkey, and other small game. Rarely does a hunter only hunt one specific season, so do not feel the need to limit yourself. However, you should inform yourself and know the weapons in play.
Standard Firearms
Standard classic firearms are the most popular tool for hunters around the world. Gun hunting season is the most popular and easily the most prolific. Standard firearms are different than muzzle loaders and include rifles, shotguns, and handguns.
Centerfire Rifles – Rifles are used for longer range hunting, and most commonly used for medium game. Centerfire rifles come in a wide variety of different types, including single shot, lever action, bolt action, pump action, and semi-automatic.
They also come in calibers suitable for animals as small as coyotes to rounds big enough for elephants.
Rimfire Rifles – Rimfire rifles are commonly quite anemic and designed for hunting small game. The most common being 22 LR, but 22 Magnum and various 17 caliber rounds are also used like 17 HMR. These rounds are suited for animals as small as squirrel and can take animals as large as coyotes.
Rimfires rifles come in all the same types as centerfire rifles.
Shotguns – A shotgun is a smoothbore weapon designed for firing a spread of shot. Shotguns are close range weapons that are excellent brush weapons. Shotguns are incredibly versatile weapons and a single 12 gauge can be used to hunt deer, bird, turkey, rabbit, squirrel, and more.
Shotguns come in a wide variety of gauges, and actions. Pump action is the most common, however, bolt actions, single shots, double barrels, and semi-automatic are also prevalent.
Handguns – Handguns are a challenging weapon to hunt with. More powerful than standard self-defense handguns, hunting handguns are most commonly large magnum revolvers or single shot pistols in rifle calibers. Some semi-automatics are suitable for hunting though.
Handgun hunting is quite difficult but is growing in popularity. Handguns in rimfire cartridges are also an effective small game hunting tool.
Air Rifles
Powerful air guns can be used for small game and medium hunting. Small game hunting should be powerful enough to propel a 22 caliber projectile at least 700 feet per second.
Medium game hunting air guns are PCP rifles that are capable of propelling something as large as a 357 grain projectile up to 1,000 feet per second.
Air guns are often quieter weapons and can be used to dispatch game quite quietly. They do not have the effective range of modern firearms. Also, do not forget to check out our best air rifle buying guide.
There is also a category for airsoft guns which are mainly used for the combat-simulating game. They do not have any place in hunting, because of the ammunition type (BBs) and lack of power.
Muzzle Loaders
A modern muzzle loader is a rifle barreled weapon that is both old and modern. They of course load through the muzzle with a modern projectile, and lack a standard metal case to contain the propellant, primer, and projectile.
These are single shot weapons that have an effective range of 150 yards. They can be mounted with modern scopes or optics or can be fairly retro in design.
Bows
Bow hunting is an incredibly popular method of taking medium game. Bow hunting is a challenging sport that requires excellent skill with the weapon. Hunting bows come in four general configurations, longbow, compound bow , recurve, and crossbow.
We also have resources on selecting best compound bow and guide to picking best crossbow.
Bow hunters can hunt anything from turkeys to bear based on their skill level. A bow does require the user to get quite close to their chosen game, so the larger and more dangerous the animal the more skill one needs.
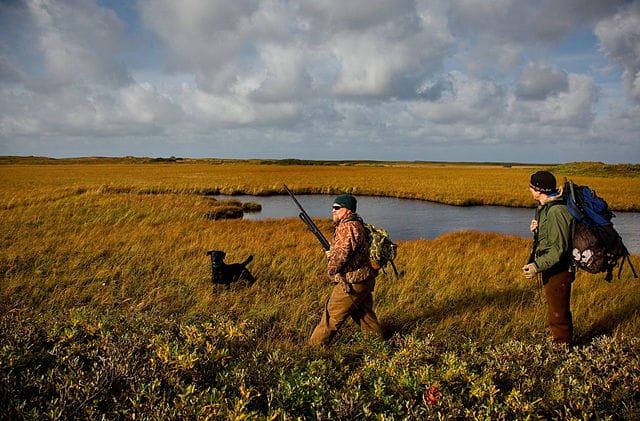
Different Hunting Methods
Hunting is a very diverse sport, and depending on your chosen game and environment, you may have to use a different method. Some methods are simply more effective than others when going after the certain game in certain environments. You may also be forced to use one method or another due to certain legalities in place.
Tree Stand
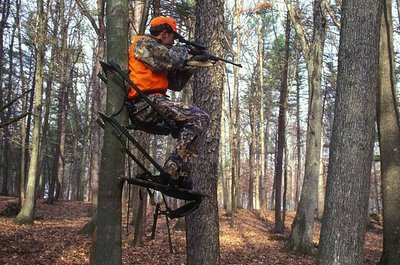 Tree stands give hunters a naturally elevated position that allows them to oversee a plot of land. Hunters in tree stands are also less likely to be seen by a game since they are above ground.
Tree stand hunters can use a nearly any weapon they choose with relative ease. There are three types of tree stands:
- hanging
- climbing
- ladder
Each has its benefits and drawbacks.
If tree stand hunting over a plain the hunter would be wise to invest in a method of feeding animals and bringing them to your stand, so long as it’s legal where you’re at. Feel free to check out our buyer guide if you are still in search of the best deer feeder.
Also, motion detecting hunting cams allow you to watch your spot even when not in the woods.
Blind
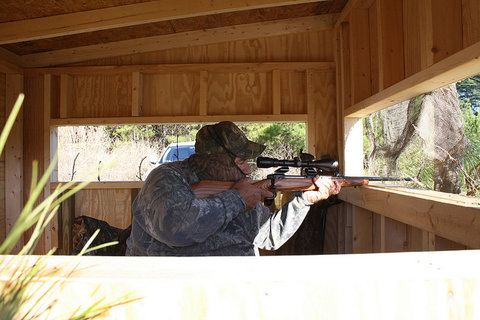
A blind is similar to a tree stand, but can be elevated or on the ground. A blind can be made of metal, wood, or cloth and fully encapsulated the hunter.
Blinds conceal the hunter and are often camouflaged to avoid being seen. Blind hunting and tree stand hunting both rely on patience, and the use of feeders and game cameras. Blinds are certainly an excellent method of staying safe while hunting.
Stalking
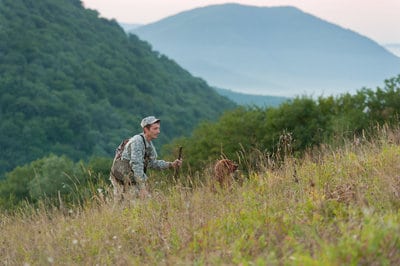 Stalking is an incredibly challenging, but rewarding style of hunting. It involves finding the live trail of a particular game type and stalking it. This requires somewhat with good knowledge of the area, and the ability to use and read a map and compass or a GPS.
Stalking requires the ability to camouflage and walk silently, while also being ready to fire accurately at a moment’s notice. For this reason, red dot optics are quite popular with stalkers.
For stalking long distances you might want to get yourself a hydration pack.
Driven Hunts
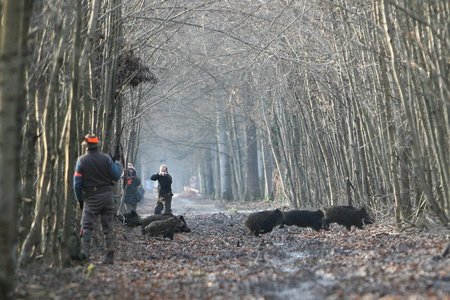 Driven hunts are where the hunted animal is driven through the woods to the hunter. This is most commonly accomplished with gun dogs (learn more about hunting dogs at huntemup.com).
Driven hunts require the shooter to act fast to kill a running animal. They also need to track the animals through GPS collar units and GPS devices. Hunting radios are another important aspect since driven hunts are most commonly team-based sports.
Long Range
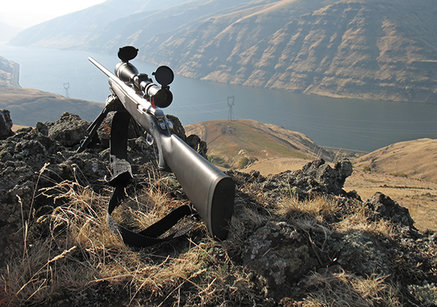 Long range hunting is often an aspect of many different methods. A tree stand hunter may have the opportunity to take long-range shots, as does a stalker. Regardless the hunter should know the area they are hunting and the likelihood of a long-range shot.
Long range hunting is difficult because the shooter must still take a humane shot. To do this a laser range finder is an excellent tool to have, as it a pair of binoculars and a quality bipod. Most of all a hunter needs the skill to take this kind of shot more than anything.
The Gear You Need To Go Hunting Tomorrow
Let’s play a little game, someone invites you to go hunting tomorrow. You have zero gear, what would you buy? For the game’s sake, it is a general gun season, in the fall, in an area you are new to. What could you buy today to be hunting tomorrow?
Of course license & permits, food, water, boots, camouflage, and an orange shooting vest, but what other gear would be needed?
Rifle
A good rifle is a good start for a hunter. A shotgun is more versatile for more types of game, but it only well suited for close range encounters. A rifle can be used effectively at short, medium, and long ranges.
A 308 bolt action rifle is an excellent start and well suited for most game in North America. I’d suggest a Winchester Model 70, a Remington 700, or a Savage Hunter.
Bowhunters would also need an arrow rest and a release aid.
Don’t forget that to carry your guns and accessories you need a rifle case or a range bag.
Optics & Sights
Modern hunting rifles rarely, if ever, come with iron sights. This necessitates the need for an optic. An optic, or scope, allows the hunter to see over distance.
However to maintain versatility the scope shouldn’t be extremely powerful a 3 to 9 power, or 2 to 7 power optic is perfectly suitable for shooting at both close and longer ranges.
These optics have the ability to cover 99% of hunting ranges. A big consideration is the scope durability. A field scope should be water and fog proof. Scopes by companies like Bushnell, Nikon, Leupold, and
Archers can use pin sights or look into crossbow scopes.
Ammunition
You can just use any old full metal jacket cartridge to hunt with. Most states restrict the use of full metal jacket ammunition anyway. Expanding ammunition is commonly used for hunting for a variety of reasons.
1. First and foremost it is more humane because it kills quicker and is more effective. Expanding ammo hits the target, expands in size and slows down greatly. This makes it safe because the round is less likely to over penetrate a target and travel uncontrolled and wildly.
2. Expanding ammunition is also most commonly premium ammunition that is superbly accurate and consistent.
Ammunition like Remington Core Lokt and Hornady Whitetail are excellent choices.
However, keep in mind that some animals especially big game like cape buffalo, elephants, lions have certain cartridge requirements.
In Africa, the .375 H&H is the smallest caliber legally allowed, for example. This ensures a humane and safe kill.
Bow hunters just need arrows and crossbow hunters bolts and broadheads.
Related: Expert Advice: The Best All Around Hunting Rifle Caliber
Knife
A good knife will get you far in the world of hunting. Hunting knives come in two trains of thought, folding and fixed.
Folding knives are often much smaller and easier to wield in closer quarters. When cleaning an animal and dressing it, a small knife is often easier to use.
Fixed blade knives often make better field knives. Cutting and hacking brush cannot be done with a small pocket knife. A fixed blade knife with a serrated edge can even be a decent stand-in saw.
Carrying both is one such option to have the best of both worlds. Folding and Fixed blade knives from Benchmade, Kershaw, and CRKT are all excellent places to start.
Navigational Tools
If you are going to be hunting in an area you aren’t familiar with, a hunting app or a GPS can be an invaluable tool. GPS units have come a very long way and now offer full-color screen options with the ability to enter checkpoints, set a home location, and connect to other GPS units wirelessly.
GPS units are expensive though, and if you know how to use one a compass is an excellent tool. I always advise looking for a well-made compass that can take a fall or drop without breaking. A military grade lensatic compass is a perfect place to start.
Binoculars
Binoculars allow you scan long ranges without issue. Some may say that a scoped rifle can do the same, but that’s foolish. For one waving a gun around is never wise, remember never point a weapon at anything you do not intend to shoot.
Binoculars are also lighter and create less perceived movement than swinging a three-foot long rifle around. Binoculars also offer two lenses, and way more power if needed.
They can be used for spotting game, other hunters, or merely scouting to find a place to set in.
As you’d imagine binoculars for hunting need to be tough. I prefer binos from brands like Bushnell and Nikon because they are well priced and do their job as needed.
In addition to binoculars, you may also want to invest in a quality spotting scope which lets you see even further. And to make accurate hunting distance estimations, a good rangefinder is a must.
Flashlight
Flashlights are another good tool to have whenever you leave the house. When it comes to hunting specific flashlights can be handier than others. Weapon lights tend to work very well for self defense, hunting and tactical use.
Since most of us start heading to the blind before sun up, a flashlight is a must-have.
Flashlights also must-haves when you shoot an animal as the sun goes down. You may have to search for a down game, and without a flashlight, you just wasted that animal.
Or, without a good light you can’t even find some animals, like coyotes, in the first place. See our guide to best coyote hunting lights to fix that.
Also, a flashlight with a blue light will make blood glow slightly. Flashlights by Stream light and Surefire are an excellent go-to flashlights.
Slings
Slings are a must have when carrying a rifle. It makes it much easier to climb, crawl, and jump and use both hands while carrying your rifle.
A quality sling can be comfortable and help support your weapon. A good sling can also be used to make a more stable platform of the body and rifle when firing from the standing position.
Slings are a very affordable and easy upgrade for your rifle.
Common Game Animals
The game across North America is diverse and offers hunters unique challenges. The most common game hunting animals in North America are hunted for both sport and conservation reasons. These animals have different strengths and different weaknesses and require different weapons and tactics to hunt.
Deer
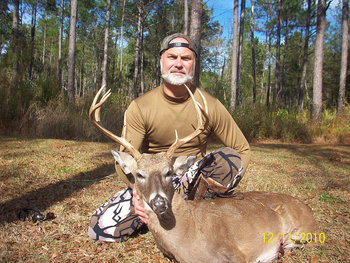
Deer are the most popular game to hunt across North America.
White tail deer specifically must be hunted, or they will quickly overrun an area, causing an increase in car accidents.
Methods and gear required:
– One of the most popular methods is still hunting with a tree stand or deer blind. Deer are naturally skittish and tend to run at the first sign of a hunter. Patience is required to hunt a deer. Deer can be hunted with shotguns and rifles, preferably 223 and above for rifles and 20 gauge and up for shotguns.
– Deer are less likely to be taken at long range, but on occasion, they can be found grazing in open fields. For these shots, a good clear scope or good binoculars is required. Most states only allow you to get doe during certain days and prohibit the killing of ‘spikes.’ If you cannot identify the horns on the deer the shot may not be worth making.
Additional tips:
- When hunting deer most common hunting ammunition is suitable, especially loads like Hornady whitetail.
- Shot placement is quite important on a deer, so once your scope is zeroed for a specific load it is best to keep using that load.
- Deer are one of the easier animals to clean, and one of the easier animals to butcher.
- Deer are not easy to hunt but are not extremely difficult either.
- Exercising patience, stressing accuracy, and utilizing proper discipline you’ll be successful.
- In order to learn more about where deer are and how they behave during the off-season, try shed hunting.
Turkey
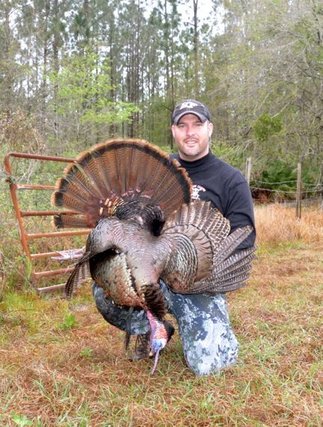 Spring Gobbler season warms the souls of many hunters.
After the fall and winter hunting seasons pass most hunters hang up the camo in sadness. Until spring turkey season comes to be.
Turkeys are fun and relatively easy game to hunt. Having a big gobbler in full show come into your area is a beautiful sight.
Hunting gobblers require quite a bit of patience. Turkeys are often hunted on the ground level because they reside in thinner woods with trees that are rarely large enough for tree stands,
Gear & weapon requirements:
- A shotgun is one of the more effective weapons for taking turkeys. Some skilled hunters do use bows to take turkey, but shotguns are the preferable weapon for most hunters. A shotgun, loaded with turkey load, and a blind are a good combination for turkey hunting.
- One of the most effective tactics to hunt turkey is to draw them to you. To do this you need a turkey call, and the skills to use it. Turkey calls vary, but there are some designed expressly for beginners.
- On top of the call, a good decoy will convince the gobbler he is onto something good. Place a few decoys into play to distract the turkey from you.
- Also when it comes to turkey hunting, the need for camouflage is multiplied. Turkeys are fickle, and they do fly. That isn’t a myth, so a turkey can disappear quite fast when scared. Shoot straight and aim true and a turkey can be on your Thanksgiving table this fall.
Wild Boar
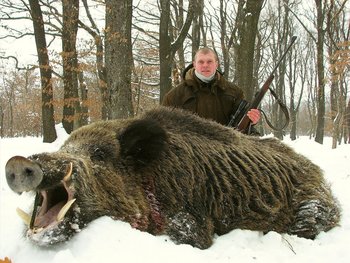 Wild Boar is an invasive species that create massive amounts of damage across the southern United States.
Wild boars are brutal creatures that most states have relaxed hunting regulations on in an attempt to get rid of them. This makes them an excellent option for beginner hunters.
They are easy to find, and cheap to hunt. The weapons used to hunt them depend on the method of hunting them. Semi-automatic rifles are popular for boar because the hunter can quickly follow up and shoot more than one at a time.
Gear required:
- Semi-auto rifles and shotguns are also popular when doing driven hunts.
- When hunting as a team make sure you maintain communication, through something like radios.
- Mixing dangerous animals, and guns is not a good idea if you can’t communicate with your team.
- Because boar are quick animals the weapon needs be quick on the target. A red dot optic aids in this quite a bit, and makes it easy for the shooter to find the reticle and hit the boar.
- Ammo wise you need something that penetrates well. A Hog Hammer round by Remington is one such load, and the Razorback 12 gauge load and 44 Magnum load by Winchester is another shotgun and handgun choice.
Hogs will eat pretty much any and everything, they destroy the land, but corn tends to draw them in. If you are a still hunter in a blind or tree stand then baiting them in with corn is a solid idea. When you do, expect more than one, because hogs rarely travel alone.
Bear
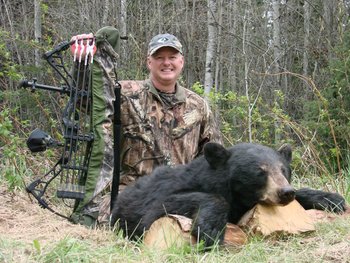 Hunting bear is an exciting, dangerous and fun sport. States where you can hunt bear legally and where bear reside can be few and far between. You may have to schedule a bear hunt with an outfitter.
Since bears are big, dangerous creatures you need to use a firearm on the more powerful side of the spectrum, or be an expert with a bow.
Firearm wise you should take something powerful like the 375 H&H Magnum, the 375 Ruger, or the 450 Ruger. When it comes to shotguns the classic 12 gauge is capable of doing the deed.
Hunting methods:
- Bear can be stalked, but new hunters are safest with a guide in tow as well. Stalking bear is easier than most animals, they tend to leave lots of track, scat, and wide paths.
- Solo hunts, inexperienced bow hunters are most likely safer in a tree stand.
- Still hunting also gives you the ability to use bait where legal, like in Alberta bear hunts. Bait will bring the bear into you, and give you a clearer, easier shot. New bear hunters would certainly be advised to take a radio, in case they get in an unsafe situation.
Bear hunting can be dangerous, but it is often not. Bear can be very skittish creatures; they will often run at the first sign of a human. So you must be patient and calm, exercise stillness and noise discipline.
Bears smell extremely well, so you even need to smell the right way to keep a bear from running. No Scent is a good key to this.
Now It Is Time To Take Action
Hunting is certainly a challenging sport, but it’s not hard. Hunting is one of those sports that proper equipment is an absolute necessity for. Without it, you risk a failed hunt, and potentially a wounded animal. Hunting is more of a mental game than a physical one. You need to know your animal, your weapon, and your hunting method. Once you know this, you can conquer any animal.
Something fun: 10 Best Hunting Shows on TV and Streaming (Where To Watch)