The key to getting the most out of your walkie-talkie setup is knowing how to use it properly.
At first glance, there can be more buttons and knobs than you may understand. But each one plays an important role that impacts your range, power, battery life, and who you’re talking to.
Knowing how to use a walkie-talkie comes down to a few simple pieces of understanding. You need to understand how to:
- use every button and dial
- turn it on
- set the frequency
- properly manage the battery power
Let’s get to it, then!
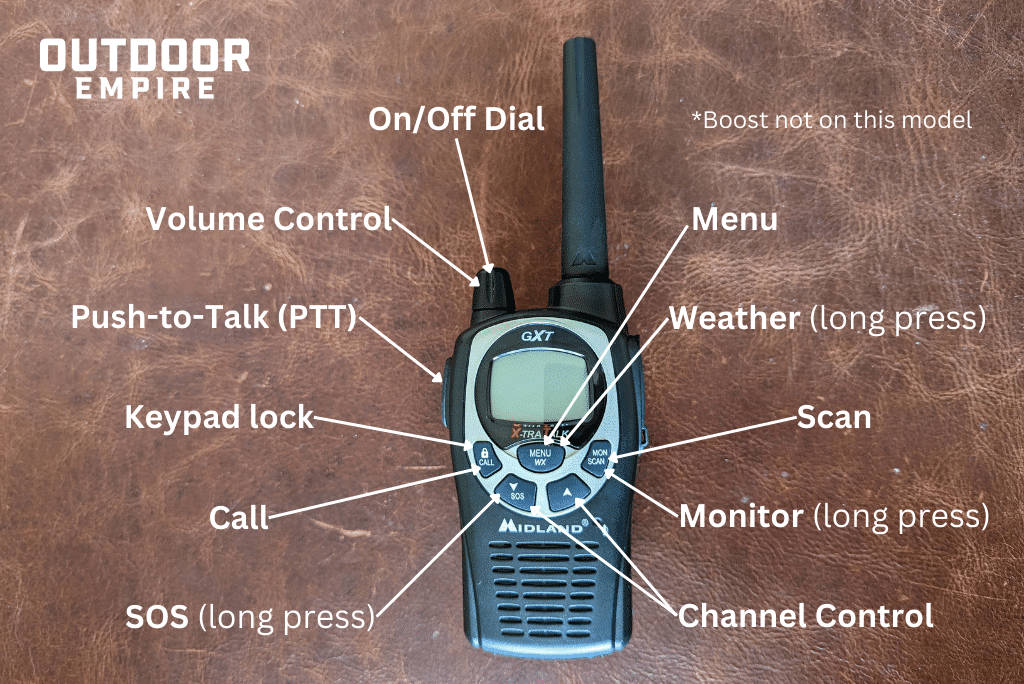
What Walkie-Talkie Buttons and Dials Do
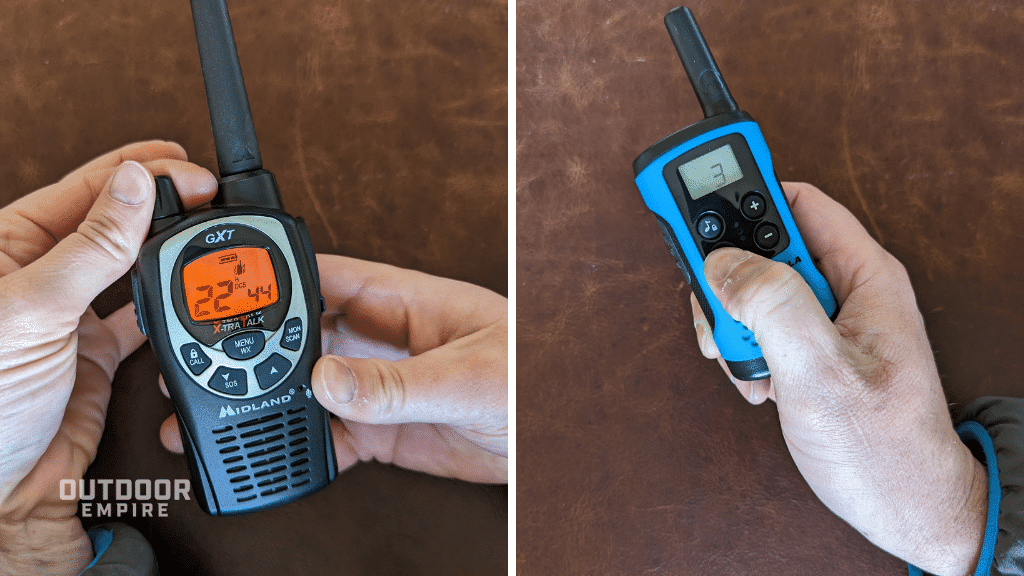
Some walkie-talkies have two buttons and a dial, while some have a full panel of buttons and multiple knobs that can lead to a huge amount of confusion.
The most common walkie-talkies have at least some of the following controls.
| Name | Function | Control Type | How to Use |
| On/Off | Powering the radio on or shutting it down | Dial, button, or switch | Twist knob clockwise to turn on, switch to on, or press and hold power button until radio powers on. |
| Volume Control | Controlling volume levels | Dial or buttons | Twist knob further clockwise for louder volume or press buttons up or down for relative volume. |
| Talk (PTT) | Transmitting message | Button | Hold while talking |
| Call | Alerts other walkie talkie users in the vicinity on same channel with a ringtone | Button | Press button |
| Menu | Cycles through menu of settings | Button | Press button |
| Boost | Boosting power and increasing range | Button | Hold in addition to talk button |
| Lock | Prevent buttons from working when accidentally pressed | Button | Press and hold lock button until switched on or off |
| Weather | Switching to weather channel | Button | Press to change channel directly to weather |
| Monitor | Listening for weak transmissions on a channel | Button | Press and hold while on desired channel |
| Scan | Cycle through multiple channels to see if receiving a transmission on any of them | Button | Press button |
| 16 or SOS | Switching directly to channel 16 | Button | Press to move to channel 16 (distress channel for marine users) |
How to Use a Walkie-Talkie Step-by-Step
Most walkie-talkies maintain a similar design to others. They use one knob and a few different buttons to control every function.
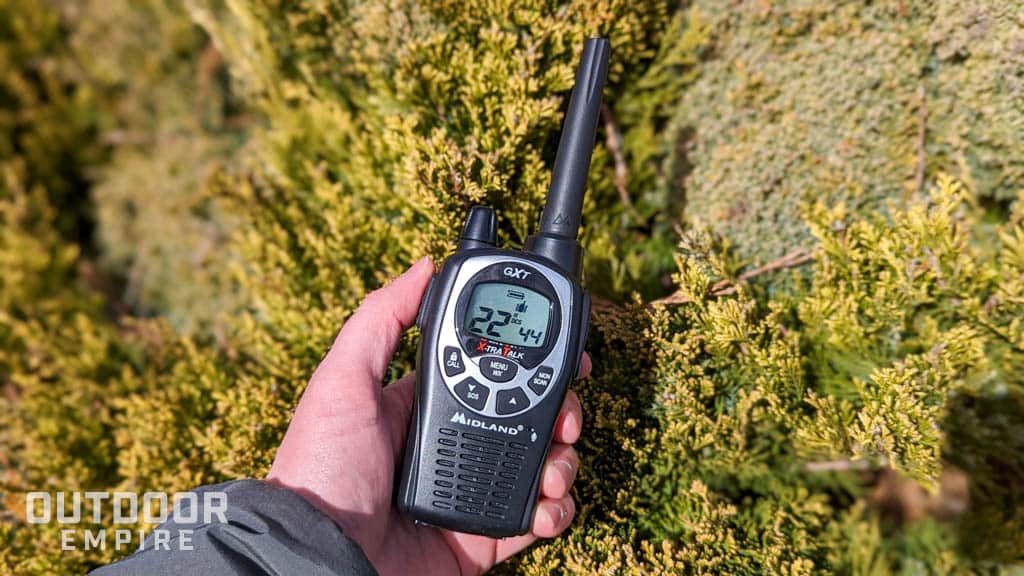
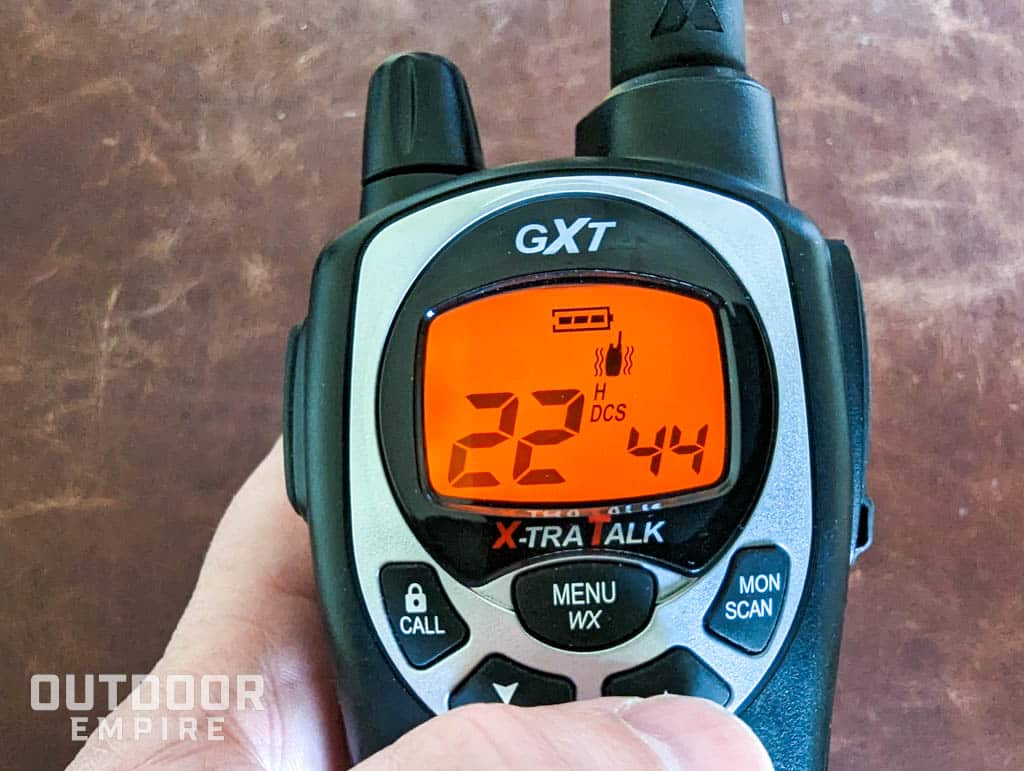
For many modern walkie-talkies, everything you’re controlling can be viewed on a small LED screen where you will find the battery indicator, selected channel, and other functions.
Here, we go over how to operate a walkie-talkie so you can get out and on to your next adventure without a hitch.
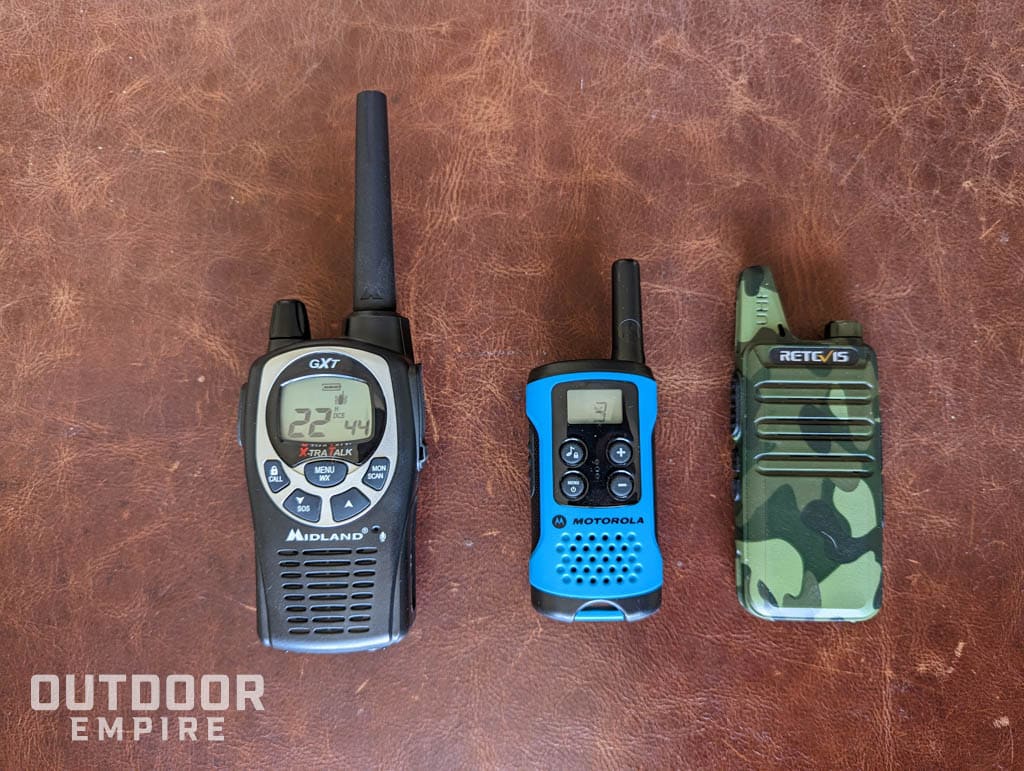
And by the way, if you’re looking for a good walkie-talkie, we’ve reviewed the best ones for outdoor recreation. Be sure to check that out!
1. How to turn on a walkie-talkie
Every walkie-talkie will either turn on with a knob on top of the device or with a power button on the side or face of the walkie-talkie.
For those with a knob, simply twist the knob clockwise and you will feel a click and hear a tone as the volume increases.
Using walkie-talkies with a button simply requires you to hold the power button until it powers on. This is usually indicated by an audible tone as long as the batteries aren’t dead.
2. Check battery life
Battery life is typically displayed on the screen of your walkie-talkie (if it has one). Some simple walkies have a basic LED light indicator or an audible warning when the battery is low.
I prefer to head out with a full charge, no matter what, but some people will be okay with 3 out of 4 bars of battery life.
Ensuring your battery is fully charged should always be the first step of any adventure. When you get out into the backcountry and your communication dies simply because of one bad AAA battery, you’ll never forget to charge up before leaving the house again.
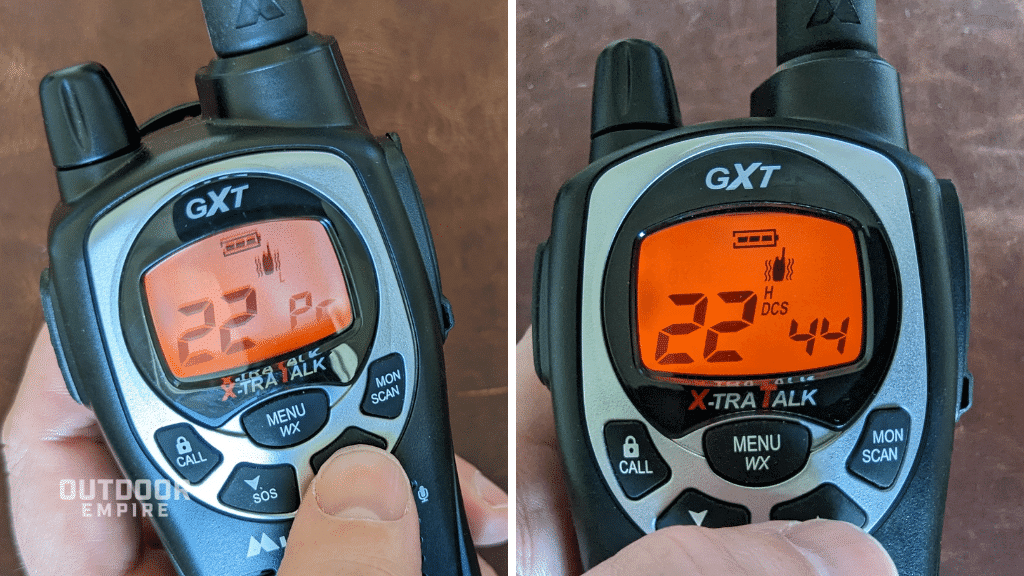
3. How to set walkie-talkie frequency (channel)
The channels on your walkie-talkies are essentially just numbers set to different frequencies. If you’re operating a more high-tech walkie-talkie, you may be moving along different frequencies. But for the most part, switching channels will be how you change the walkie’s frequency.
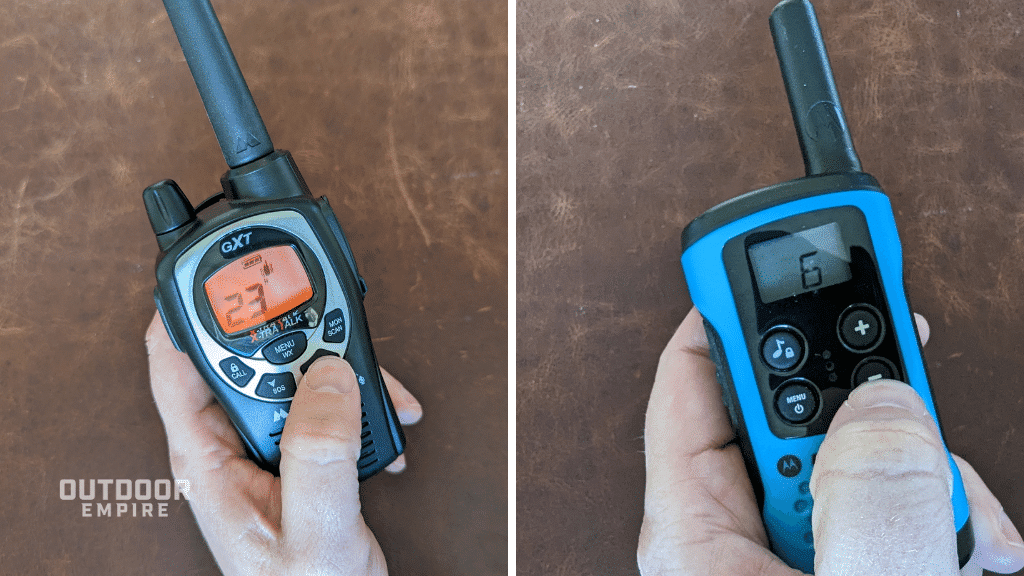
To select the channel, simply turn the dial, or press the channel button up or down until the same channel is indicated on all the walkie-talkies in your group.
Always try to pick a channel that is free and clear with no other users in your area.
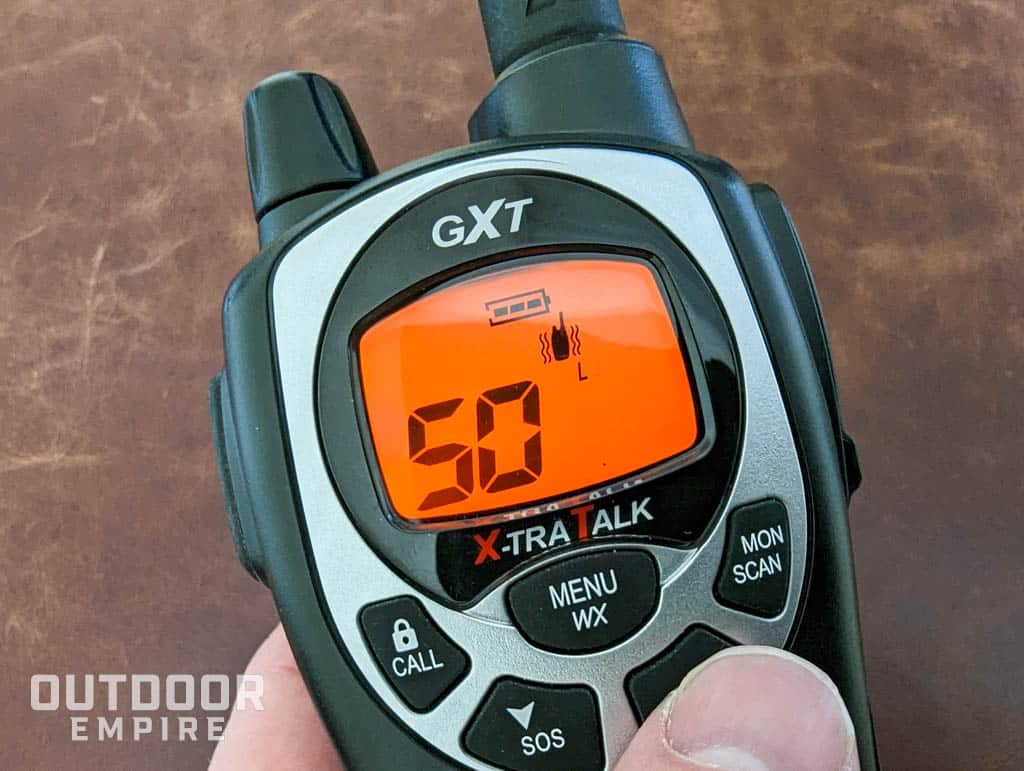
PRO TIP: Channels 1-7 and 15-22 transmit on a higher power than channels 8-14 on most walkie talkies. Stick to the higher power channels if you think you’ll need longer range, but know that it will likely consume more battery power too. If you’ll be staying within a half mile (0.8 km) of your group, you’re probably fine to stick to channels 8-14.
4. Push-to-talk
Now that you’re all synced up, it’s as easy as pushing the talk button and getting your message across.
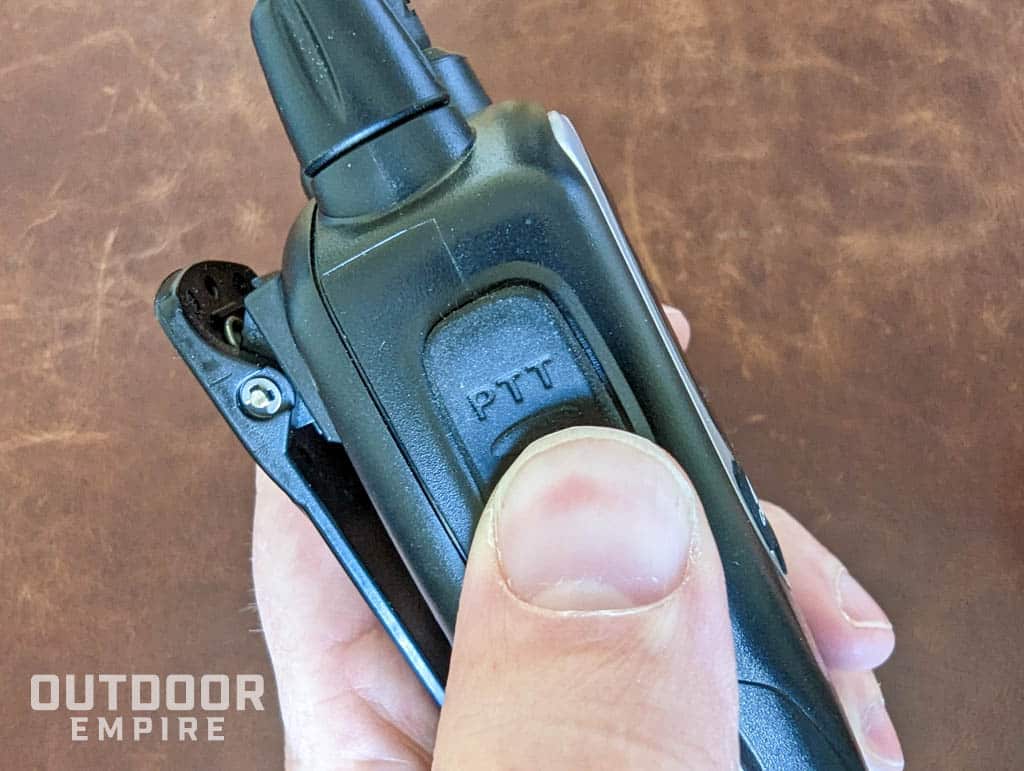
One thing to keep in mind when you start to talk is to hold the talk button (a.k.a. push-to-talk or PTT) down for at least one second before starting to talk. This prevents any messages from getting cut off at the beginning, which happens all the time.
When talking on the radio, it’s essential to know the proper walkie-talkie etiquette to respect other radio users and get clear and concise messages to other group members.
For many walkies, the talk button will use a set level of power to put out your signal. This helps to save battery life, rather than always boosting and maximizing the radio’s range. But there always comes a time when you need to get a message past all those obstacles.
5. Boost power
This is when you utilize the walkie-talkie’s ability to boost a message. For many walkies, the boost button will be located right below the talk button so that you can hold them both at the same time.
Boosting your message will inevitably use more power than usual, so use this function only when necessary. For example, when you get out of eyesight with others and there are a lot of trees or other obstacles in your way, boost your message to ensure it gets across.
NOTE: You cannot “boost” power on channels 8-14 due to FCC rules, so it won’t work on those channels. If you think you might need to boost where you’re at (e.g. forest, mountains, urban area), choose one of the other channels in advance.
Remember that if you use the boost button, it’s going to consume more battery power. So don’t get too carried away!
RELATED: Best Long Range Two Way Radios
6. Where to keep your walkie-talkie
Now that you know how to use a walkie-talkie, you must know where to put it. This can seem like a silly thing to consider, but it can make a huge difference in a variety of situations.
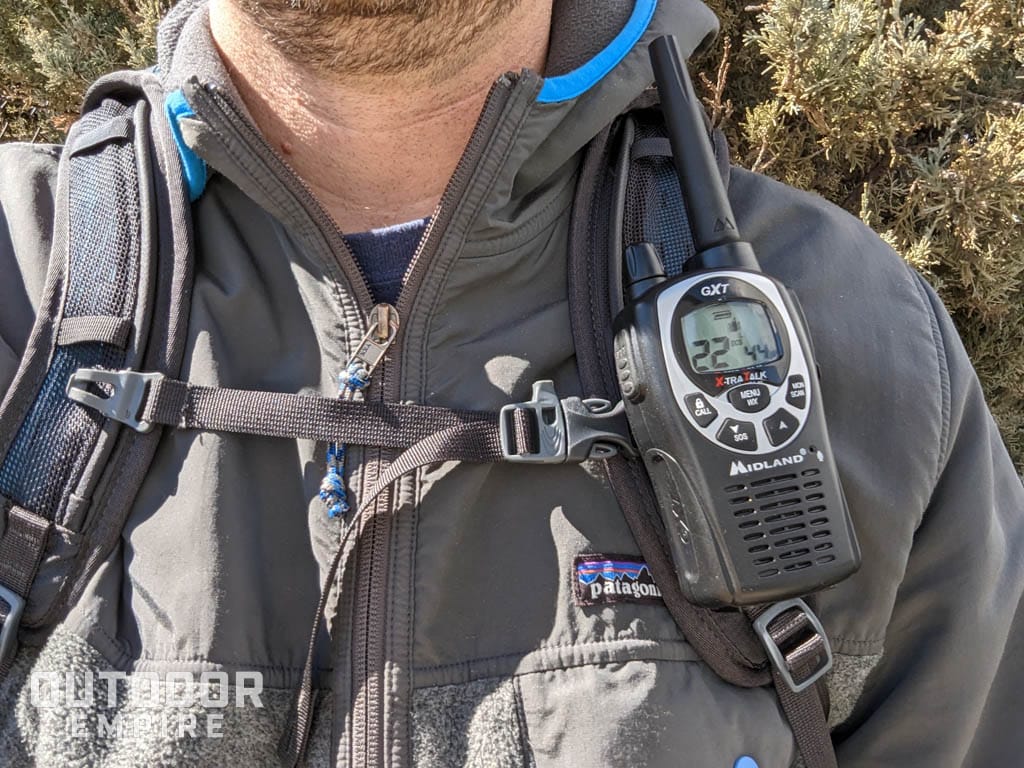
For example, if your walkie-talkie is zipped in a pocket and an emergency pops up, scrambling to get it out of your pocket can delay getting the help you need. Having the radio in an easily-accessible place, like clipped to a backpack strap, makes it easy to get to when you need it most.
7 Common Mistakes You Can Avoid
There’s a learning curve when you first start using walkie-talkies. After a few outings with them, it will become second nature, but here are some common mistakes you’ll want to look out for in the beginning.
1. Avoid channel confusion
Here are some tips to make sure your walkie-talkies are keyed into the same channel as the others in your party:
- Sync up on site. Decide on channels once you’ve reached your starting destination, but before setting off on the trail or into the woods. If you choose a frequency at home, it may not be the best where you’re going.
- Choose a primary channel for your group. Choosing multiple channels in a prioritized order is a good idea in case others are in the area on the same frequency.
- Decide on a private channel. For larger groups, pre-select a second go-to channel as the ‘private’ channel for side conversations.
- Choose a backup channel. A backup channel that everyone in your party knows can become incredibly useful.
2. Confirm privacy codes
Many nicer walkie-talkies enable you to set a privacy code which are essentially sub-channels. While they provide even more options for communicating solely with your group rather than everyone else around, they can also add to the channel confusion.
If you use privacy codes, make sure your walkies are all set to the same one. These can vary by brand, some having multiple privacy codes available. A mixed fleet of different brands of walkie-talkies may struggle to find compatible privacy codes. You’ll need to reference your particular walkie’s manual to set your privacy codes.
Setting privacy codes is usually just as easy as setting your channel, but sometimes it’s unnecessary. To avoid confusion, I only switch on privacy codes when I’m in a heavily trafficked area or if I run into some interference while out and about.
In a way, privacy codes are to a channel what room numbers are to a floor on a building. There can still be other people milling about on your channel, but being in a private room reduces your chances of being disrupted.
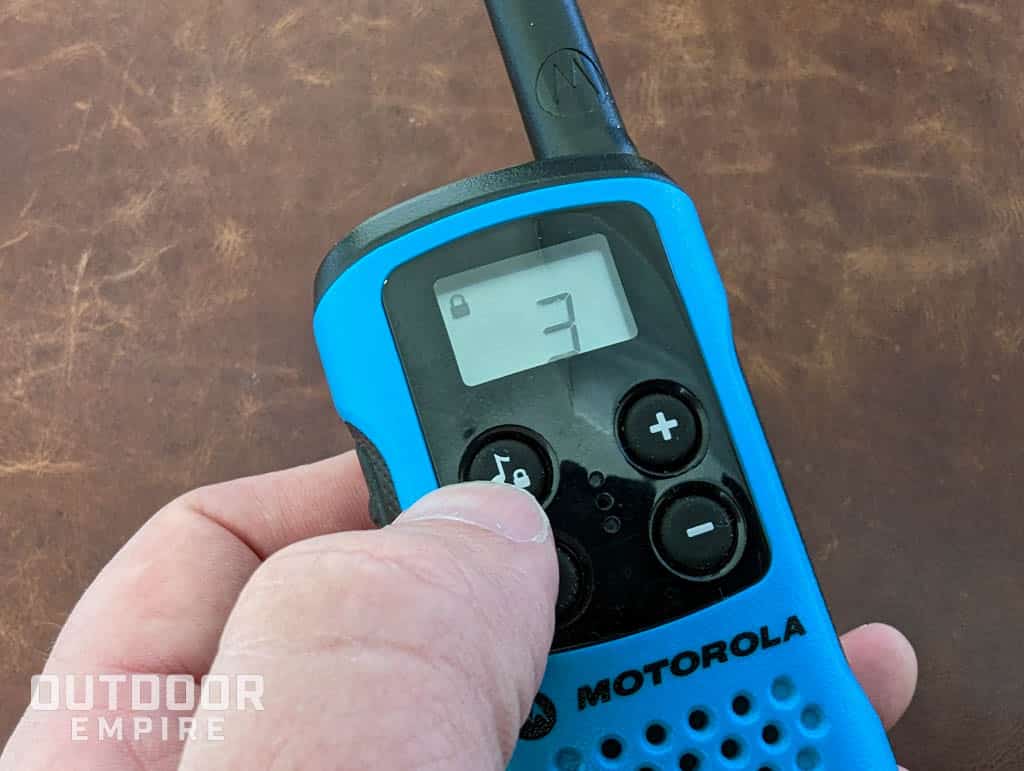
3. Use the keypad lock
Perhaps the most common mistake is not to utilize the keypad locking feature. This prevents the walkie from switching channels or transmitting when a button mistakenly gets pushed. The keypad lock will keep you on the same frequency as your group.
Buttons get pressed all the time when you’re moving around outside. The result is a lot of radio noise filled with the rustling of one’s jacket or background conversations.
This can be hilarious. But it can also be dangerous when you need to send an urgent message but the radio waves are occupied by someone’s recollection of last weekend’s shenanigans.
It’s a good idea to turn the keypad lock on if you stick your two-way radio in a pack or pocket. Just remember to turn it off when you need to talk.
4. Check for low battery
Another big mistake is failing to check the battery before heading out. Batteries will die, especially in the cold weather, and it’s necessary to plan by checking before you go.
5. Turn up the volume
Always make sure that your volume is turned up! It can be easy to turn the walkie on and leave it be, but when a message comes in, you want to ensure that you can hear it loud and clear.
6. Have realistic range expectations
Walkie-talkies aren’t like cell phones. They operate based on line of sight, though the radio waves can penetrate some obstructions.
Within a mile or so is usually doable with most consumer-grade walkie-talkies. Up to five miles can be achieved in terrain that is not too dissected or forested, especially with a decent GMRS walkie-talkie.
However, the 15, 25, and even 35-mile range specs found on many walkie-talkie packages are based more on theoretical physics than real-world conditions. Maybe you could get that on a perfectly clear day from one mountain peak to another with zero obstructions, but don’t count on it.
If you’re planning on being separated by longer distances, looking at more long-range alternatives to walkie-talkies is always a better option.
7. Get a GMRS license, if you need one
Standard walkie-talkies that don’t require a license (FRS) are the most common ones you’ll find at outdoor retailers.
However, they are limited to a maximum power output of 2 watts, depending on the model. If they have a boost function, you’re likely going from something like 0.5 watt output to 1 watt output.
A GMRS walkie-talkie can boost power up to 50 watts and use an external antenna, though 5 watts with a built-in antenna is typical.
These generally have additional channels or frequencies available that transmit at a higher power, have greater communication range, and are less prone to interference.
But GMRS walkie-talkies require a special FCC-issued license in the US, so be sure to get that if you get GMRS-enabled walkie-talkies. They’re sold everywhere, but the fact that you need a license for them is not widely advertised.
A GMRS license costs $35, is good for 10 years, and applies to an individual and their immediate family.
Managing Battery Power
Battery life on walkie-talkies varies widely by model, battery type, and the environmental conditions you use it in, especially temperature. Here are some things you can do to get the most out of your walkie-talkie battery.
Where to carry
In the cold, you want to make sure you have your walkie-talkie right up against your body when possible. This will keep it warm, helping to extend the battery life as much as possible. For example, a chest pocket in your ski jacket is a great spot.
On the other hand, when it’s hot, keep it out of direct sunlight and outside of any container that might heat up inside.
Your backpack strap can still be a good spot if it’s shaded by a hat, but don’t leave it in a hot car or inside an airtight container in the sun like a Pelican case or bear box. The greenhouse effect and batteries are a bad combo.
Radio check-ins
When on a longer trip or working with low battery levels, I like to schedule radio check-in times with my group. This means that we don’t all need to have the walkie-talkies powered on at all times and will only turn them on to check in.
This helps significantly reduce the time the radio is powered on and saves a ton of battery since having them on all the time uses a huge amount of battery.
Multi-day trips
On multi-day trips, it’s necessary to bring spare batteries and another power source. Depending on your trip, bring some batteries, a solar charger, and maybe even a power bank to charge up beforehand so it’s ready to go when needed.