

Picking a compound bow that fits you and your hunting style is a critical choice.
Not only will you have to carry your bow around for the entire hunting season, it is a huge factor in that deciding moment that ultimately determines whether or not you are successful.
A bow that is the right choice for a given hunter is like an extension of their body. They can operate it smoothly and it is a precise fit for optimum efficiency.
The wrong hunting bow can create a multitude of complications:
- If the draw weight is too great the hunter may not be able to smoothly and stealthily draw the bow on game. Once the bow is drawn, the shooter may also have problems holding it steady while preparing to shoot.
- A bow that does not fit correctly is more difficult to aim.
- If you buy a bow that is too heavy or not compact enough it can be a serious burden if you hunt where you cover a lot of ground or travel through brush.
- Bows that are too heavy or not good fits often create bad shooting habits.
- Not buying the right bow the first time around will often be more expensive since you have to buy a replacement.
Clearly, there is more to picking a bow than just going with a popular brand or the right camo pattern. But, with a myriad of options out there, how do you know which bow is for you? This article will guide you through the process and hopefully help you arrive at the right bow for you.
In this article:
- first up is our best bow picks for variety of categories
- then we explain what makes a good compound bow
- if you didn’t like our recommendations, then you can use our overview of leading compound bow brands to start your own research
DISCLOSURE: As an Amazon Associate I earn from qualifying purchases. Links in this article are affiliate links. If you click on a link we may earn a commission if you make a purchase, at no additional cost to you.
12 Top Hunting Bows of 2021: Outdoor Empire Reviews
Among our 12 recommendations, the bows below are our top picks for hunting bows in 2021:
-
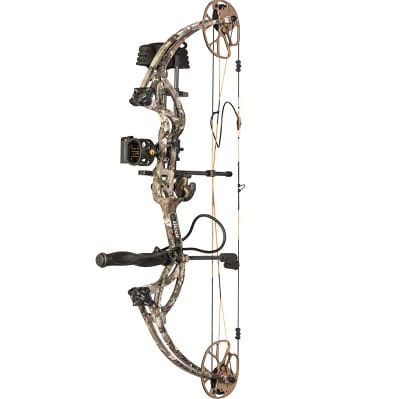
- Best overall: Bear Cruzer G2
- Best for the money: SAS Rage
- Fastest bow: PSE Archery Full Throttle
- Best for youth: Bear Archery Cruzer RTH
- Best beginner: Quest Forge DTH
- Best compact: Mandarin Duck Nighthawk
- Best cheap: iGlow 55lb
- Best left-hand: Diamond Archery Edge Sb-1
*Looking for a specific feature? Check out our quick-reference chart below:
| Category | Overall Bow | The Money | |
|---|---|---|---|
 Bear Cruzer G2 Bear Cruzer G2 |  Infinite Edge Pro Infinite Edge Pro |  iGlow 55lb iGlow 55lb |
|
| Speed | 315 FPS | 310 FPS | 310 FPS |
| Weight | 3 lbs | 3.2 lbs | 4.4 lbs |
| Brace Height | 6.5" | 7” | 7.5” |
| Axle to Axle | 30" | 31.5” | 31.5” |
| Draw Weight | 5-70 lbs | 5 - 70 lbs | 40 - 70 lbs |
| Draw Length | 12-30" | 13-31” | 25-31” |
| Cost | Check Price | Check Price | Check Price |
Best Overall
Bear Archery is one of the best compound bow manufacturers, and the Cruzer G2 is their flagship compound bow.
The Cruzer G2 is your typical compound bow in looks, but that’s part of why it’s a classic and such a good value.

Compare prices at: Walmart, Sportsman’s Guide, Cabela’s
Is it worth the price?
Absolutely.
You can get a compound bow that’s better than the Cruzer G2, but you’ll be spending a lot more money for only a little bit better bow.
Instead of paying for a much more expensive bow that won’t actually be any more accurate, why not save that money and upgrade the included whisker biscuit arrow rest to a drop-away style instead?
Specs
- Speed: 315 feet per second
- Weight: 3 pounds
- Axle to Axle: 30 inches
- Brace Height: 6 and 1/2 inches
- Draw Weight: 5-70 pounds
- Draw Length: 12-30 inches
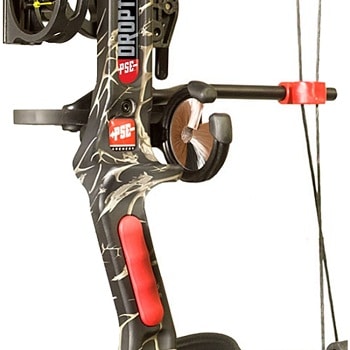
2. Bowtech Reign 7
The Bowtech Reign 7 is a pro-grade hunting bow that’s not for the faint of heart. It’s a powerful, smooth shooting bow that sends arrows downrange at 340 feet per second. It’s not the fastest, but delivers consistent accuracy shot after shot.
It is SmartBow and the idea behind it is that you can harness complete and total control over the bow from the moment you touch the string to releasing it.
For an example, OverDrive binary cams allow you to fine tune the bow for your needs and PowerShift technology provides provides distinct draw cycle options.
Features
- The Bowtech Rein 7 allows you to customize the draw weight in 10-pound increments. Starting at 50 and going to 70 pounds.
- The draw length is also adjustable from 25 to 31 inches.
- It’s a lightweight 4.3 pounds and delivers a consistently smooth and controlled draw.
The Rein is an overall outstanding bow. It’s not a cheap one, but when you want the very best, it costs you.
3. Best Compound Bow for the Money
Many people find that in respect to their hobbies, it is difficult to afford everything top of the line.
There are those who are interested in getting into bow hunting or compound bow shooting. But when they see some price tags, they drop the idea altogether.
For those on a budget or even those who may only shoot occasionally would be interested in a bow that works well with a low price, the SAS Rage is just the thing.

Southland Archery Supply is a small company that developed the Rage which is an adult bow. It comes in black or camouflage, and you can purchase packages with it.
Overcome the Downsides
Its weight can be tiring when sighting or hunting with it. It also has been known to have string issues as well as loose bolts. It is not the quietest either so silencers may help.
It would be wise to replace the bow string right out of the box. With the loose bolts, many overcome it by purchasing a dampening kit to reduce the vibration, plus check and retighten them when shooting too.
The SAS Rage is hard to beat when it comes to a good buy bow. If you don’t mind a heavier bow or a little extra maintenance, it is one of the recommended bows on the market for the price.
Specs
- Draw Length: 26″ – 30”
- Speed: 270 FPS
- Weight: 4.4 lbs
- ATA: 35”
- Draw Weight: 55 -70 lbs
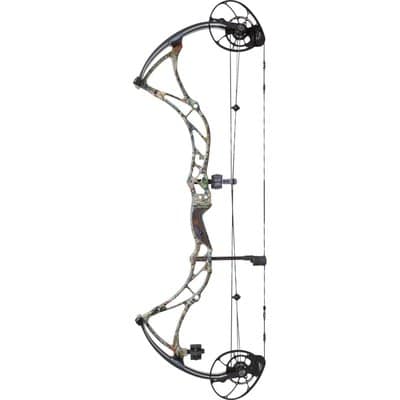
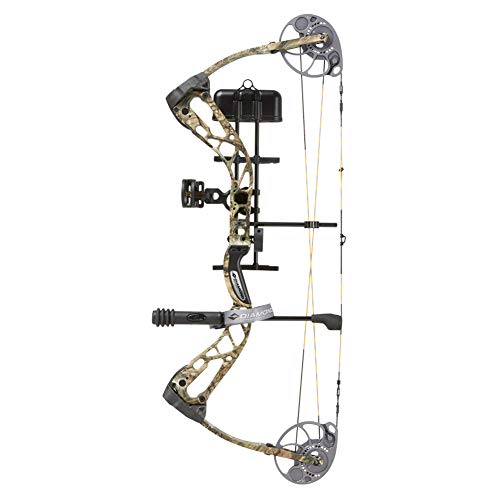
4. Infinite Edge Pro Bow Package by Diamond Archery
Before you look at the price of the Infinite Edge Pro Bow Package I want you to remember the key word here is package.
Package being the keyword. This isn’t just a bow, it’s a complete archery package. The only thing not included is the arrows and a target.
The Diamond Archery Infinite Edge bow is already an outstanding bow:

Compare prices at: Bass Pro Shops
What the package includes
The bow is great, and the package provided is fantastic. It includes a 3 pin Tundra Sight, a hostage XL arrow rest, a Deadlock Lite octane quiver, a tube peep sight, a BCY string loop, a wrist sling, and 5-inch ultra-lite octane stabilizer.
Add in the bow and you really are getting an excellent deal for the money.
Specs:
- Speed: 310 FPS
- Weight: 3.2 Lbs
- Brace Height: 7”
- Axle to Axle: 31.5”
- Draw Weight: 5-70 lbs
- Draw Length: 13-31”
5. Fastest Compound Bow
The PSE Full Throttle is the fastest shooting bow in the world. Through a stunning feat of engineering shooters are seeing speeds up to 370 feet per second with the Full Throttle. This defies most expectations and PSE is certainly proud of their feat.
The Full Throttle is an outstanding bow and lives up to the PSE reputation. The Full Throttle uses a hybrid cam system and preloaded limbs. The cams are made from 6061 T6 aluminum so its super strong and will last forever.
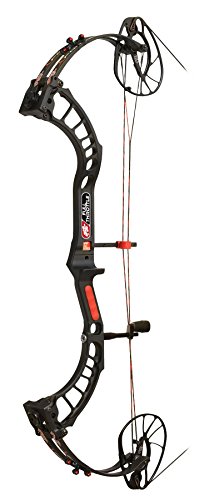
Who is it for?
While the PSE Full Throttle is an outstanding bow it’s not for every shooter. This bow is for experienced shooters and isn’t suited for newbies. With speed like this you need to have your draw length down to a science or you are wasting the bow’s potential.
Specs:
- Speed: 370 FPS
- Weight: 4.1 lbs
- Brace Height: 5.25”
- Axle to Axle: 33.25”
- Draw Weight: 50 to 70lbs
- Draw Length: 26.5” to 30”
6. Best Youth Bow
Bow hunting is a very complex form of hunting.
The dedicated practice and confidence, approach, closing the distance, accuracy, thinking under pressure, making quick and ethical judgments.
These are just a few of the extreme factors that bow hunters face continually.
With the younger generations, we find that children are becoming more exposed and have better access to learning adult sports at an early age. Those who do not understand bow hunting may see that teaching it to children is unhealthy since it involves a weapon.
The reality is, it teaches them deeper lessons that can help them through their life:
- improving by practice
- confidence
- hard work
- making decisions
- strength
- exercise
- love for the outdoors
- overcoming failure
- endurance
- an everlasting respect for nature
Many companies understand these valuable lessons for the future generations and have made it possible to accomplish these. The Bear Archery Cruzer does just that.

Specs
- Draw Weight: 15 -70 lbs
- Draw Length: 12″ – 30 “
- Let-off: 75%
- Brace Height: 6.5″
- Weight: 3.6 lbs
7. Best Bow for Beginner Hunters
Many people find that entering into a new hobby can be overwhelming because it is difficult to determine what is essential and what isn’t.
It seems that Prime had the beginners in mind when they built and set up the Quest.
It is constructed for those individuals who want to get into archery and could eventually decide that they would like to get into hunting as well.
It comes with everything needed to get out and get shooting.
One thing that every beginner should know is their draw length since it will determine the bow settings and arrow lengths, and this is easily done in nearly any archery store. This will also narrow your options and make everything a bit less overwhelming.

Out of the Box
Right out of the box, it comes with everything you need to shoot (minus the arrows):
- stabilizer
- tool-less fiber optic sight
- Halo full containment rest
- neoprene wrist sling
- meta peep
- rubber stabilizer
- quiver to hold your arrows
- rest for your arrow
From the rest to the quiver, it seems that the best attachment it comes with is the tool-less fiber optic sight.
Any archer who has been shooting since the fiber optic sights came out understands how great tool-less sights are. No need for two or three different size hex keys in your pockets while out on the range.
Specs
- Draw Length: 25.5″ – 30″
- Weight: 3.9 lbs
- Draw Weight: 40 – 70 lbs
- ATA: 32”
- Brace Height: 7”
- Speed: 315 FPS
8. Best Compact Bow: Mandarin Duck Nighthawk
The Mandarin Duck Nighthawk is the oddest looking bow I’ve ever seen, but it does give users a lightweight, and compact option. It’s remarkably small, but also quite powerful. It’s only 24 inches long and weighs only 4.4 pounds.
It’s still capable of launching an arrow at 270 FPS. This odd Duck is an interesting design and is compatible with both left and right-handed shooters.
Features
- Besides its small size and lightweight, the Mandarin Duck Nighthawk is compatible with a 5 pin sight, an arrow rest and take down quiver.
- The draw weight is 50 pounds and length is 27 inches.
- It’s remarkably accurate and packs a good punch for such a small bow. It’s easy to strap across your back and hit the field with.
- The included pistol style grip aids in control and makes drawing the bow simple for most shooters.
- It’s great for maneuverability, especially if you are hunting in thicker brush, or have a well-camouflaged tree stand.
9. Best Cheap Bow
New shooters maybe looking to dive into the bow world without spending a ton of money. It’s understandable when it comes to a new and expensive hobby like archery.
The iGlow 55 lb lets shooters try their hand and archery and have that opportunity to get hooked on tossing arrows down range.

The iGlow was chosen not only due to its low price, but because it’s a relatively easy bow for any shooter to pick up and shoot.
Conclusion
The iGlow is a very basic bow that doesn’t include a ton of fancy features.
Instead it focuses on being brilliant in the basics. Its rudimentary sights aren’t fancy, but they’re effective. It’s accurate and easy to shoot, and you are best suited using traditional aluminum, fiberglass, or carbon with this bow.
The bow is available by itself at a great price, or you can choose package options that will set you up with a variety of accessories and upgrades for a great price.
Specs:
- Speed: 310 FPS
- Weight: 4.4 lbs
- Brace Height: 7.5”
- Axle to Axle: 31.5”
- Draw Weight: 40 to 70 lbs
- Draw Length: 25-31”
10. Best Left-hand Compound Bow
The Diamond Archery Edge SB-1 is a bow built from the ground up for left-handed shooters. It does have a right-hand variant as well, but they didn’t just move some features over and call it left handed. This is a true Southpaw bow. This maximizes comfort, safety, accuracy, and ease of use for all you lefties out there.
The Diamond Archery is a solid performer for hunting or recreation.
Best Bows From ATA 2019 Trade Show
Anyone hunter that’s ever had an animal jump string on them understands the frustration of a loud bow. Understandably, there seem to be millions of variables for each shot of a hunt. In this article, we will review some of our favorite bows from ATA 2019.
11. Best Overall Bow: The Mathews Triax
 When a manufacturer puts forth an effort to reduce these variables of their bow, the product will help your chances of a more successful hunt. Especially dampening vibration and sound! When it comes to buying bows, we tend to lean towards certain brands. This is because they have created trust with consumers and stand by their names.
Mathews is a name that everyone seems to know because they only develop high-quality bows. Their only goal is to help their customers be as successful as possible. By creating bows they themselves love to use, they did not disappoint with their newest flagship bow, the Mathews Triax.
The Triax stands out above the rest with its new technology. It provides an outstanding 78% less vibration than the competing bows! This Matthews is a compact design that allows hunters more maneuverability to get into extremely close range.
Coming in at 28 inches from axel to axel, the Triax is even better in tight areas than its competitors. We think it is one of the most balanced, stable, and accurate bows ever made. Not only is it ridiculously quiet, but it has been designed with the Mathews Crosssentric Cam System.
The Triax was designed to maintain accuracy by keeping the nock at travel level. Additionally, you can purchase a flat back grip. This is a synthetic rubber grip made to concentrate pressure at full draw. This reduces hand torque.
Specifications
Brace Height: 6 inches
IBO: Up to 343-feet-per-second
Axel to Axel: 28 inches
Draw Lengths: 24.5 to 30.5 inches
Draw Weight: 50, 60, or 70 pounds
Let off: 75 or 85%
Weight: 4.4 pounds
MSRP: $ 1,099
Learn more about Mathew’s Bows.
12. Best Value for the Money
Not every hunter can afford top of the line equipment in all areas of hunting gear. So, it’s great when you can get products that both get the job done and allow you to stay on a tight budget. Bear is a company that makes hunting affordable for anyone that wants to get into the sport.
If you are looking for a bow that is great for the money but still has the feel and accuracy of a name brand flagship bow, then look no further than the Bear Approach HC!

When it comes to speed, the Bear Approach HC is neck and neck with most high-end bows. It comes in at 340-feet-per-second! How is this possible? Their hybrid cams obtain the speed. In addition, the Approach has been designed with Sonic Nocks. These cut vibrations to help keep your bow as quiet as possible.
Another fantastic design feature of the Bear Approach HC is the at-home adjustable draw length. It completely eliminates the need of a bow press! This allows anyone to fine-tune perfect length for themselves.
At $449.99, this bow cannot be beaten when it comes to speed and accuracy. This is the perfect bow for anyone that needs to stay on budget but doesn’t want to sacrifice quality in order to do so.
Specifications
Brace Height: 6 inches
IBO: Up to 340-feet-per-second
Axel to Axel: 32 inches
Draw Lengths: 25.5 to 30 inches
Draw Weight: 55 to 70, or 45 to 60 pounds
Let off: 75%
Weight: 4 pounds
Other Reviewed Compound Bows
Factors to Consider Before Purchasing
With a wide array of bows on the market, it may be difficult to find the exact one you want.
It is very similar to shopping for a new vehicle. If you don’t know what kind of car or truck you want, then with so many decisions, it would be easier to just walk to wherever you want to go.
But, by breaking everything down, the decision almost presents itself “What will be my main use for the vehicle? Work, transportation or play?”.
Once you have that figured out, you can narrow your search down and get on the right track for a car or truck.
This same idea applies for archery, ”What will my main use for the bow be? Hunting, target shooting, recreation?”.
Most people get into archery for competition shooting or hunting.
In this section we focus on features and specifications that make up a good compound bow for hunting.
Speed
![]()
With hunting in mind, it seems that speed is the one thing that grabs a hunter’s eye more than anything.
Ten to fifteen years ago, if a bow could shoot over 250 FPS, it was a jaw dropper. With all the current advancements, some bows are now capable of shooting up to 370 FPS.
Jumped String
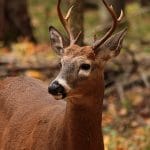
Anyone who has ever archery hunted seems to have the same story to tell. As soon as they shoot at an animal, the animal moved right before the arrow even hit it. This is called jumped string.
This sickening sight causes any hunter to think back and wish that he or she had a faster bow for it to give better shots, more accuracy, lower arc, and a more ethical kill. With that in mind, it is essential to make sure the bow’s speed is right where you want it.
Just to remind you that speed isn’t everything.
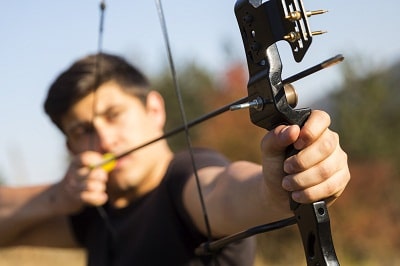
Achieving Accuracy
![]()
With the thought of ”speed isn’t everything” in the back of your mind, there is one thing that should be rated higher than speed.
Don’t get me wrong. I love the fact that we can shoot as fast as we can. But as long as my bow shoots around 300 FPS, I am shooting an arrow the full length of a football field in one second.
So can I shoot an apple off someone’s head the full length of the football field? Of course, I would never try that, but that brings up the next major point — accuracy.
Brace Height
Besides consistency in shooting and a well-tuned bow, brace height plays a huge part in accuracy. It is the measurement from the grip of your bow to the string where you place your arrow. The taller the brace height is, the easier it is to shoot the bow.
However, the taller the brace height is, the slower your bow shoots. So when the brace height is smaller, the faster and less accurate the bow shoots. Before you take less accurate to heart, let me explain.
The majority of shooters find the 7 inches brace height to be optimal, 6 inches are considered as speed bows and 8 inches are competition bows. So anything out of the 6-8 inches range are bows for special purpose.
Focusing On Getting Better
The difference would be similar to me trying to play golf against Tiger Woods when he was in his prime. I could use the same golf clubs that he used and he would have smoked me.
The reason is because his golf clubs were blades, meaning the sweet spot was a lot smaller to hit. So his form had to be perfect for his shot to play out exactly how he wanted it to.
This same example fits perfectly for a small brace height. If you have perfect form and you are able to do the same thing every time, then the brace height won’t make much of a difference and you will want a shorter one to help with speed.
But if you torque your wrist or are shaky when in the valley of the draw, then your shooting will suffer immensely.
The main thing is to first learn how to shoot a compound bow properly, and then after a lot of practice you should start worrying about advanced factors like brace height.
My Experience
I have been shooting bows for over 30 years and I still feel that I don’t have great form.
I prefer a taller brace height over speed, mainly because if there ever comes a day where I need William Tell a shot and shoot an apple off someone’s head at 100 yards, I will have a 1% chance instead of a 0% chance.
Weight
Again, your bow’s weight is dependent on your purpose. If your goal is for recreation or target practice, then you can use a heavier bow and set it down between shots.
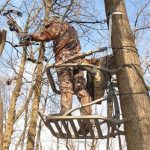
If it is for hunting, then it is important to note that you will be carrying your bow, gear, arrows and everything else for as long as you are hunting. It can be quite exhausting to carry your hunting gear and to hold your bow up or even at full draw for certain lengths of time.
Now, when a manufacturer advertises the weight of their bow, remember that they are referring to the dry weight. You still have to account for the weight from the sights, arrows plus broadheads, rest, and quiver.

Just a small tip if you plan on hunting, it is suggested to practice shooting your bow with a quiver full of arrows and anything else you might have on your bow when trying to harvest an animal.
Understandably, the amount of weight that the quiver full of arrows is very minimal. But when crunch time comes, muscle memory is all you will have to do as you draw and release your shot.
The weight of the quiver on the side of your bow may not throw you off when shooting something like 30 or 40 yards. But if you are trying to reach out to 60 yards, it may affect you more than you think.
Let-off
Let-off is basically the amount of mechanical relaxation that your bow achieves at full draw, which is measured in percentage. It is usually the same proportion with the bow’s peak draw weight.
If your bow is set to 60%, it means that as you draw the bow back it is 60 lbs, but once you get close to full draw the weight reduces. This way you can pull a bow back and hold it at full draw.
This fantastic invention allows the shooter to have time aiming without added shaking if you had to hold the full 60 lbs. This ultimately will increase accuracy.
If you are hunting, then this is the whole reason you are shooting a compound bow — to be able to pull back 60 pounds and hold at full draw for as long as you can until the animal steps out from behind the tree or turns and gives you an ethical shot.
Importance of let-off in hunting
The greater percentage will allow more time at full draw and give you more hunting opportunities instead of becoming fatigued and needing to lower your bow.
Many hunters know that in that moment from when you pull your bow back, you need to hold perfectly still while your heart is beating out of your chest.
If you become fatigued and lower your bow, usually that drastic move will cause the animal to see you and to stop in their tracks. These are reasons why hunters choose a high percentage so they can avoid many disappointing experiences.
Make sure to check your state’s rules and regulations as some states have a requirement that a compound bow cannot exceed at a certain percentage of the let-off.
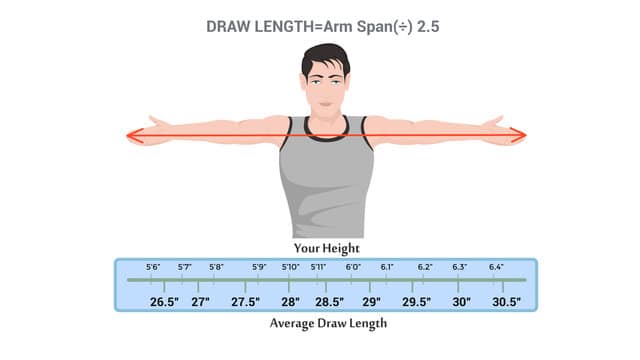
Draw Length
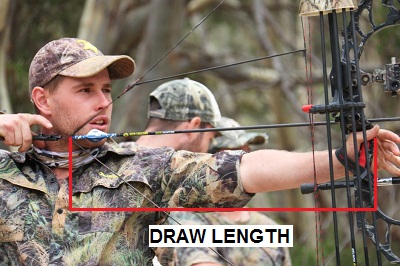
Knowing your draw length will narrow your options and make everything a bit less overwhelming. This is done in different ways but it measures your wing span or one arm up to a certain point.
It gives a great guideline for setting up a bow with what should be comfortable. If you have too long draw length, then you will be pulling the highest poundage a lot of further back into your draw and it will cause other inconsistencies.
A shorter draw length is also hard and requires you to bend your elbow or not get the bow back to your anchor spots against your face.
Choosing the length of draw
I highly recommend getting fitted at a pro shop for any bow you want to buy or even try to shoot. Draw length is probably the most important aspect and setup you need to shoot a bow correctly.
It does not only create consistency but it also greatly reduces injuries like slapping your forearm with the string, to hurting your shoulder if pulling the bow back too far.
Some of the modern compound bows have the ability to adjust the draw length fifteen to twenty inches right there in your living room. Other bows require different cams or machines to change the draw length.
Any pro-staff can easily figure out your draw length with you there in their shop. But here’s a simple technique for you:
Draw Weight
Understand that not all bows are versatile when it comes to the poundage. Many bows are designed with a 10-pound adjustment window.
For example, you can purchase a bow that will have the lowest weight setting at 50 pounds and the max that it can be set to is 60. These bows may require different cams or limbs to withstand the new weight. Then there are bows that can be set from 13 to 70 lbs.
Recommended Ranges for Modern Compound Bows
| Very small child (55-70 lbs) | 10-15 lbs |
| Small child (70-100 lbs) | 15-25 lbs |
| Large child (100-130 lbs) | 25-35 lbs |
| Small framed women (100-130 lbs) | 25-35 lbs |
| Medium framed women (130-160 lbs) | 30-40 lbs |
| Athletic older boy kids (130 lbs-150 lbs) | 40-50 lbs |
| Small framed men (120-150 lbs) | 45-55 lbs |
| Large Framed women (160+ lbs) | 45-55 lbs |
| Medium framed men (150-180 lbs) | 55-65 lbs |
| Large framed men (180+ lbs) | 65-75 lbs |
It’s also important to have matching arrows for your bow’s draw weight, check our article on choosing the best hunting arrows for more information.
State Regulation
Some states have minimum poundage that you must have your bow set to attempt to take big game.
When I first turned ten and was old enough to deer hunt in my state, I knew the minimum poundage for Arizona was 40 lbs. I shot my bow every day and did as many pushups as I could to try to meet that goal.
It took me a couple of years, but I finally got my bow set at that weight.
The reason for the minimum poundage is a great and much needed law. As any true hunter understands, an ethical kill is something that is always desired.
If your bow is shooting a lower poundage and a lower amount of kinetic energy then even with a perfect shot, you may just end up wounding the animal you are after. Just like draw length, some bows can be easily adjusted at home in a matter of seconds.
Sights
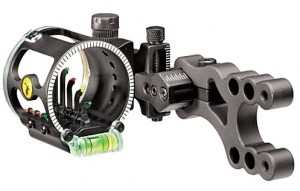
The sights on your bow allow you to pin point how high to hold your bow depending on how many yards you are from your target.
For many, they would have a pin set at 20 yards, the next would be at 30 yards and so on in increments of 10 yards. With the modern advancement in bows, understandably the accuracy has progressed in leaps and bounds. Sights are one of these progressions.
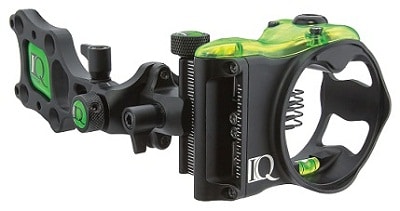
Different Types of Sights
It seems there are more options with different sights than there are with bows. From floating pins to 7 pin setups, the options are limitless.
If your bow doesn’t come with a sight, you need to understand the area and style you will be hunting. Tree stand, still hunting, ground blind, spot and stalk. Each sight has a benefit for those different styles of hunting.
7 pin sights are ideal for spot and stock or still hunting. This allows you to approach an animal or jump one and quickly find the pin depending on the distance.
The floating pin or adjustable single pin is perfect for ground blinds or a comfortable tree stand where you can adjust the sight to where the animal may be standing.
Make sure to also read our article on how to sight in a bow.
Sights & Ethical Shot
The new advancement has also opened the door for sights such as 5 or 7 pin fixed, with the bottom pin being a floater. This allows the shooter to dial in a distance much farther than some believe ethical.
For some avid hunters, they will practice a really far shot such as 80 yards. Not to hunt at that distance, but it allows them to fix flaws with forms since mistakes are drastically noticeable.
Then when they move up to a closer distance, they are more consistent and make fewer mistakes with their form.
Keep in mind that you need to be extremely confident at any distance to make an ethical shot and you should only hunt within your confidence range.
Rest
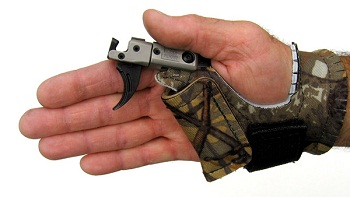
A rest is an attachment on the bow that holds the arrow consistently in the same place and same angle every time as you draw back your bow and shoot.
Back in the day, the shooter would hold the arrow in place as they draw their bow back in order to keep it from falling off.
Rests have pretty much followed the technology with the sights, from drop away or whisker biscuits to mechanical rests, all the different styles are available. With the new styles, each one is effective so it comes down to preference.
Whisker Biscuit
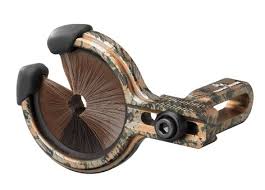
A whisker biscuit is a bunch of bristles that hold your arrow in place but also allows the fletchings on the arrow to slip through the bristles unnoticed.
Drop Away
Drop away rests will hold your arrow up and when you release the string, the stand will drop and the arrow will float and shoot forward.
As with anything mechanical it can always malfunction, many people will steer clear of them because of the risks that they have. With any malfunction, it can cause the arrow to shoot off to one side or even injure the shooter among other results.
It all depends on who you talk to and what their preference is and the stories they have heard. I have personally shot both and both did the trick.
Further reading:
The Best Arrow Rests of 2019: The Definitive Guide (In-Depth Reviews)
Release Aids
Even though it isn’t part of a bow or attached to it, a good release aid can work wonders in grouping from consistency to perfect shot placements. A good release helps you draw the bow in comfort while waiting at full draw if need be.
Style
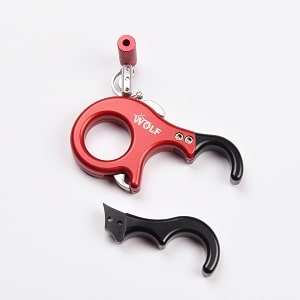
There are a few different styles, some strap around your wrist and others are hand-held. Many of them are adjustable to different lengths which matter to get consistent anchor points which result in more consistency.
A cheap release-aid can have a stiff trigger which can cause flinching when trying to shoot at an animal during that adrenaline rush. The trigger shouldn’t be choppy at all, it should be a smooth process.
Hook caliper and double calipers are just a couple options for release-aids. Some argue that the double moving caliper is the way to go as the string won’t slip off the release, it will slide out smoothly seems how both jaws are moving at the same time.
Test them out first
Just like purchasing a bow, the way to find out what style of release you want is to test drive as many as possible. Any pro shop or big name outdoor store will have numerous release-aids that customers can try out until they find the exact one they want.
Some vary in size, length, and styles so you might end up buying one and then with more experience look into a different style.
Price to Quality Ratios
Price and quality are what majority of the people initially look at and want to know when purchasing a gear. You first need to understand what you plan to do with your bow.
If you are an adult, you can just buy one bow to last the rest of your life depending on the quality and money you invested on it. For those that are just going to shoot occasionally, then there is less need for a top of the line bow.
Purpose
If you are going to hunt, then there are corners that cannot be cut. Or if you are going into competitive shooting, then you might want the top of the line for the opportunity of the perfect shots.
Low-cost but cheaply manufactured bows tend to malfunction so sacrificing certain things make buyers regret later.
Looking at the top of the line bows, you are guaranteed quality which may even surpass the shooter themselves if being shot with poor form. For these bows, you must be willing to drop close to or over $1,000 for the bare bow.
Then there are great bows with good quality that the shooter could match and others that you can surpass. Poundage is one thing that many hunters and shooters can surpass so that needs to be accounted for and thought for future use.
My Experience
The bow I used to shoot as a young adult was my dad’s bow in the late 80’s.
I shot that bow for years until I was able to save up the money for a higher end bow. Then I went to several archery pro shops and shot every bow they had until I found one that felt perfect, smooth and most importantly comfortable in my hand.
In all honesty, it wasn’t the bow I was expecting. It didn’t cost me $1,000, it was just a basic no named bow that I liked. I didn’t buy it for the name. I bought it solely because of how it felt and how consistently it shot for me.
My wife recently did the same and ended up with a less expensive bow even when shot side by side with the top of the line bows.
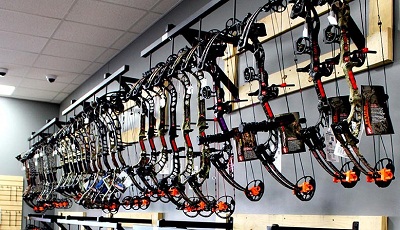
Leading Compound Bow Brands
Precision Shooting Equipment (PSE)
Precision Shooting Equipment (PSE) is the largest privately owned archery manufacturer in the United States. PSE seems to incorporate everyone who may be interested in archery. Located in Tucson, Arizona, their customer service and their dealers seem to be top notch.
Any given day out on the range, the majority of bows that people will be shooting are PSE. Simply because this company offers such a wide variety of bows that everyone can afford and enjoy.
A lot of people have complained that their bows seem to have small issues or they need to be tuned quite often. But they have good customer service that are always willing to stand by their product and correct anything that is out of the norm such as a defect or mechanical issues.
Bowtech
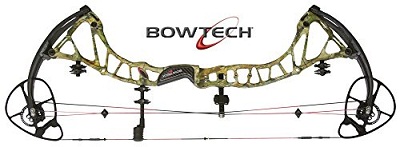
Bowtech turned up the heat back in 2005 with their Allegiance by shooting it at 315 FPS.
This caused all of their competitors to up their game in order to hang with Bowtech. Their engineering seemed to have one up on all the other competitors. But as of today, the speed of all the bows has peaked around 350 FPS.
They produced the RPM 360 giving a speed of, well, 360 FPS. With a bow this fast, it is nice to see that they still have their engineering team always trying to improve their bows, and they are still in the business.
Bowtech also has their Diamond series bows, produced for those people who want to get into hunting but don’t want to take out a second mortgage on their home. Reasonably priced, their Diamond bows can hang with PSE’s lower priced bows.
Customer service
One thing to take into account is that if you ever have any issues with your Bowtech bow, hopefully you have a great pro shop that you can take it to.
Their customer service is sub-par in the sense that even if your bow is still under warranty, you will have a fight on your hands.
Your best bet would be to take your bow to a local pro shop and see if their rep can help you out.
But that is a tricky part too. Some pro shops and major outdoor stores have stopped selling Bowtech because of this.
Regardless of the fact that their customer service isn’t that great, their flagship bows are hard to beat. Speed, accuracy and price range all fall in the range that a professional would expect them to be.
Mathews
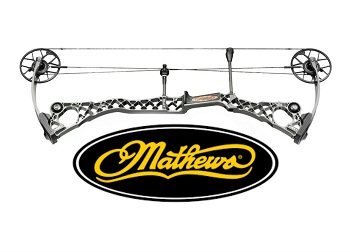
Matt McPherson first started making bows back in the early 70’s.
In the 90’s, Matthews came out with the Solo Cam which was considered by industry insiders as the greatest innovation of that era. The Solo Cam was quieter and extremely easy to tune making it a game changer in accuracy.
McPherson is an outdoorsman and understands what it takes to run a company. He understands that the hunter or consumer is what makes a company thrive so he has always put the customers’ needs before that of the company’s profit.
With just the opposite as Bowtech, Matthews’ customer service couldn’t be any better. They try to resolve all issues and concerns within a 24-hour window. They are a well-known brand and always produce quality equipment.
Hoyt
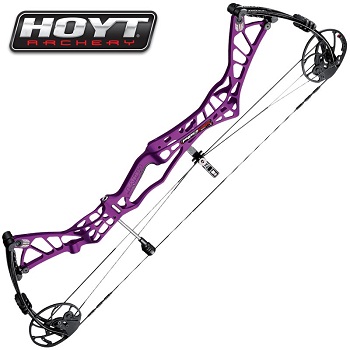
Hoyt is arguably the best of the best when it comes to competition and hunting bows.
With a quick visit to a non-sponsored pro shop, you will find nothing but great customer service and advice as the pro shop wants you to return to their store again.
Hoyt has been around since 1931 and seems to be the premier choice for celebrities and people with money. Once again, the phrase, you get what you pay for fits perfect for Hoyt. With their new carbon bows, they seem to be leading the industry in quality and performance.
Now, It Is Your Turn
When it comes to these top of the line manufacturers, it’s like you are arguing over Chevy, Ford or Dodge.
Each of those truck manufacturers does a great job, but if you ask some people who have strong negative opinions regarding a brand or two, and refuse to drive a certain type because of bad experiences or other issues.
The same goes for PSE, Bowtech, Mathews and Hoyt. Each company does a phenomenal job and pushes its competitors to be better.
But don’t just go and make a purchase of the first one you see. Make sure you test drive each brand, each model and decide for yourself, not just because your favorite celebrity shoots it. Shoot it because you feel comfortable shooting it.
This post is part of our hunting & shooting gear guide.
Other resources worth checking:
National Field Archery Association
North American Outfitters – Hunting bows service and repair.
Bowhunting Safari – Organizes bowhunting excursions worldwide.
Comments are closed.