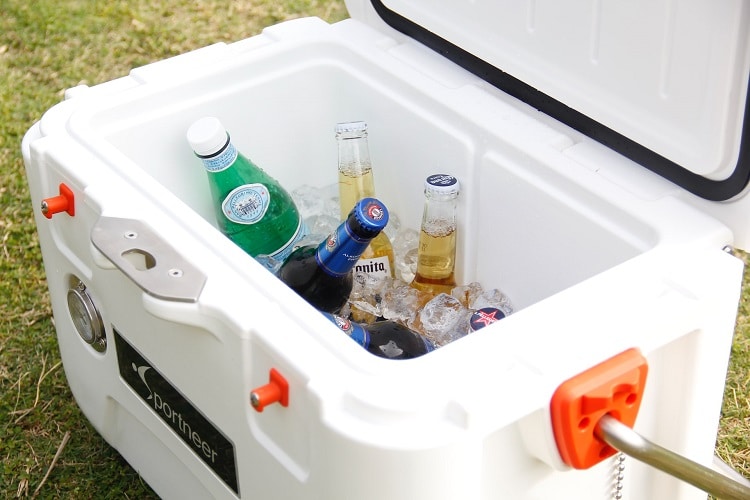
Coolers are a staple of any outdoor activity. From keeping the food cold during a summer canoe trip to holding the drinks for Saturday’s soccer game, they are essential to any successful adventure or event.
However, while many people use coolers weekly or daily, they probably don’t know how a “large plastic tub” keeps their beverages or food at the right temperature.
Coolers keep your items cold via air seals and insulation, which combat two major methods of heat transfer. A cooler seals off items from the outside air, which prevents convection from occurring. The ice chest’s insulation prevents conduction by creating layers between the items and external heat sources.
This article covers how a cooler keeps things cold, what coolers are made of, the science of how it all works, and a few other helpful bits to help you understand your cooler better.
How Does a Cooler Work?
A cooler is a portable, insulated container to maintain temperature and freshness for perishable items. Food, drinks, or other perishable items are usually placed inside the container with ice, often in a bag or block, and a top seals the container from outside factors like the sun or temperature.
To understand how a cooler keeps things cool, there are two terms about temperature transfer that are important to understand: convection and conduction.
Convection
Convection is the movement of air throughout a medium, and since warm air cannot flow through a cooler when it is closed, the cooler stays the temperature of the items placed inside it. This is why ice stays frozen for hours or days at a time, depending on the outside temperature and quality of the cooler seal.
The reason coolers are made airtight or have aggressive seals are to prevent the transfer of heat via convection. The better the seal, the more cool or warm air (depending on the cooler’s contents) is retained and not swapped with exterior air.
Additionally, more outside air introduced to the cooler means more energy is required to bring it to the core temperature of the cooler. Essentially, investing in quality seals and airtight coolers ensures your food or beverages retain their intended temperature for longer.
Conduction
Conduction is the other method of energy or heat transfer. This is the transfer of heat across a substance. For instance, if the sun is beating down hard on a cooler, the core temperature of the cooler itself will rise due to the heat transferred through the wall of the cooler. However, coolers with better insulation or higher-quality materials will have lower conduction levels.
Because insulation plays such a significant factor in the cooler’s level of conduction, it’s essential to understand the different kinds used in a cooler.
Recommended Reading: Best Coolers for Ice Retention
Factors That Affect Your Cooler
There are a variety of factors that affect how successful your cooler is at keeping your items at the proper temperature.
- What is the airtightness of your cooler?
- What is the wall thickness of your cooler?
- Is your lid filled or hollow?
- Is the cooler wall filled or hollow?
Each of these plays a major role in keeping the interior of your cooler at the desired temperature.
How Insulation Works
Various insulators are used in ice chests. Some of the most common include fiberglass, rock wool, cellulose, styrofoam, polystyrene, and polyurethane.
Some insulators, such as styrofoam, are budget friendly but have a high conduction level and minimal insulation. Others, like the more expensive polyurethane foam, are far denser and have a low conduction level, making them both heavier and better at long-term insulating items.
While you can do independent research on your specific cooler to determine its conduction level, we compiled a list of insulators to help make your cooler shopping a little easier.
Styrofoam: The lightest and cheapest insulation, styrofoam is highly conductive and prone to breaking.
Polyurethane Foam: Used in higher-end coolers, this pressure-injected foam is durable and provides excellent insulation due to its low conduction level.
Polyethylene Foam: Usually used with soft shell coolers, it’s cheaper than polyurethane insulation but more durable than styrofoam, making it a middle-of-the-road insulator.
Vacuum Insulation: Employed by high-end cooler makers like Yeti, this vacuum between layers in the cooler is effective at combating conduction. With the top seal of the cooler lid, this is the highest level of insulation you can find in a cooler on the market today.
What are Coolers Made of?
Various materials are used to make these modern marvels, depending on the kind of cooler. Soft coolers are usually made from canvas, cotton, polyester, nylon, and vinyl, while hard coolers often incorporate Styrofoam, polypropylene, metal, and other plastic variants.
Here are a few of the more commonly used materials, along with their pros and cons.
Metal: Usually stainless steel or aluminum, these coolers are heavier but incredibly durable and have excellent insulation.
Plastic: Made from various rugged plastics, these ice chests or coolers usually come with wheels or carrying handles and are best suited for outdoor events where damage may occur to the cooler.
Canvas: These low-profile, durable fabric coolers are excellent for single-person meals and can withstand various conditions, from days on the water to work luncheons.
Cotton: This incredibly lightweight fabric is moisture-resistant and a budget-friendly option for picnic-loving persons. However, this insulation is usually weak and isn’t great for all-day affairs.
Vinyl: The most budget-friendly of all the coolers, the vinyl coolers are a great choice if you’re not worried about having this cooler for years to come. The insulation varies by cost, but it’s hard to beat these lightweight containers for the price.
Hollow Lids vs. Filled Lids
Many of the more inexpensive coolers come with hollow lids. This is usually due to the manufacturer attempting to cut costs or weight from a cooler, even though it results in the loss of the insulation properties of the cooler. While many people focus on the insulation placed in the walls of a cooler, it’s essential to take stock of what the lid of your cooler is made of.
The benefit of having a hollow lid on your cooler is that it is both lighter and usually cheaper. Great for the ballfield or midday picnic, these coolers are budget-friendly and can keep your items cool for a short time.
However, long-duration excursions such as fishing trips, camping, or even keeping items insulated when the power goes out mean proper insulation on the top of your cooler. While this will add to the cost and make the cooler heavier, keeping your things insulated is worth every penny.
If you’re looking to upgrade your cooler without purchasing a new one, you can use a drill to make a hole in the cooler lid and inject a spray foam of your choice into the lid for added insulation.
Note: Be careful when injecting foam into the lid of a cooler, as it can cause the plastic or polymer frame to warp as the foam expands. Inject small amounts until the foam is set for proper installation.
FAQs
Here are a few frequently asked questions about coolers.
Does the thickness of my cooler’s wall matter?
Yes and no. While the thickness does increase the weight and distance between outside heat sources, it doesn’t always denote more insulation. A 3-inch thick styrofoam cooler will still be more conductive (and thus heat up faster) than a 2-inch thick cooler with vacuum insulation. Pay more attention to the insulation than the wall thickness.
What is the best insulation for my cooler?
This depends on both budget and type of cooler. For soft skin coolers, the Polyethylene foam will do the job and won’t break the bank. Polyurethane Foam is the most common insulator for hard shell coolers and is not nearly as expensive as vacuum insulation.
How do I maintain my cooler long-term?
Check the manufacturer’s specifications on how to clean your cooler, as some chemicals may destroy the seals or finish in the cooler’s interior. Soap and water are always safe, and never store the cooler while it is still wet, as this can lead to mold and rot.
Can you upgrade to a cheap cooler at home?
Yes. However, DIY projects like this can damage the integrity of the cooler. Adding insulation to walls or lids, upgrading the seals, and painting the cooler are great ways to upgrade your budget cooler, but investing in a higher-end cooler may be better long term.


