Hunting is a hobby that involves a lot of dedication, knowledge, hard work and luck. One thing that is constant with every hunter out there is that they are always searching for ways to improve their chances of harvesting an animal.
Using a deer feeder is one method that many hunters employ to achieve better opportunities for a successful hunt. There are different styles to choose from — some are attached to a tree trunk, others hung from a tree or mechanism, and still others are raised on a stand.
Deer Feeder Types and How To Build Them
There are many many ways that you can build a deer feeder. You may even be able to successfully improvise one. However, this article will focus on some of the most popular types of DIY deer feeders.
Trough Tables
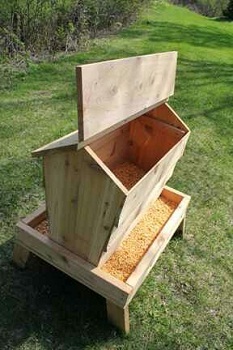
One of the most popular types of deer feeders you can build is a trough table. The steps for building a trough table are very simple, and are as follows:
- Collect sturdy, easy-to-use building materials (wood or metal are popular choices).
- Build a simple table with sturdy legs.
- Add raised edges.
- Add a simple covering, such as a sloped roof (optional).
You can adjust the design of a trough table to your preference, but the basics of this design are easy to achieve. Beyond its simplicity, this design is popular because it allows deer to approach the table and see all around them as they eat. Some deer may be discouraged if part of their view is blocked while they eat.
There are some possible downsides to this design, such as the fact that you have to refill it continually, which can become cumbersome and possibly expensive depending on how far you intend to travel. It is also exposed to weather conditions and pests.
However, these issues are easily solved. One option is to add a container (which can be made of wood, plastic buckets, barrels, or anything else that you have access to) that has holes on the sides near the bottom. Then place it in the center of the table. This allows you to fill up the container and tray with the corn or grain.
As the tray is emptied, the container uses gravity to fill up the plate. Your visits to refill it can now be spaced out. Meanwhile, you can address exposure to the elements by adding a covering and choosing a spot for the feeder strategically.
Gravity Feeder
Another basic feeder is a gravity feeder, or mounted game feeder. There are many different styles of this type of feeder, and which one you should choose depends on what materials and tools you have available, as well as your experience with building and crafting.
Gravity feeders keep a limited amount of food accessible at one time. However, these will not give you quite as much control over how much feed is distributed as an automated feeder would.
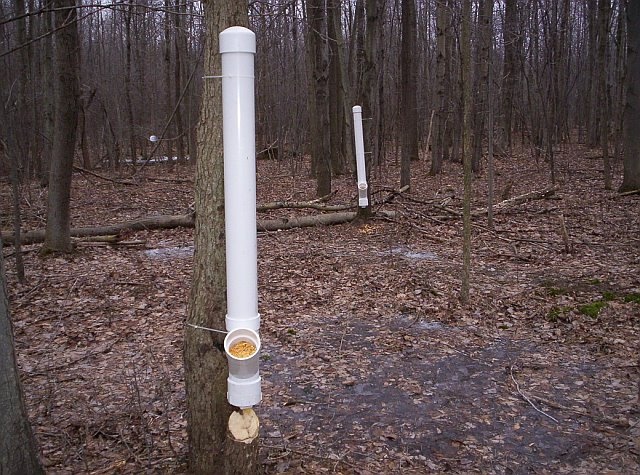
People often build DIY gravity feeders using PVC pipe or other durable, hollow materials. PVC pipe is popular because it is cheap and easy to work with. Some common styles include:
- “J” shape: Perhaps the most popular style is a long, wide tube or pipe with a cap on the top. At the bottom, place a 90-degree elbow and then a 45-degree angle pointing up — forming a “J” shape.
- This will allow you to fill up the tube without the grain falling out directly. The deer will be able to eat from the 45-degree angle piece. As they eat, gravity will refill the base with grains.
- “Y” shape: For the most part, other variations only change at the bottom. For a “Y” shape feeder, use a 45-degree “Y” attachment piece with the 45-degree part pointing up. For the bottom hole, use a cap with a form of grating cuts in it.
- “L” shape: Use a 90-degree elbow and then more pipe length and a cap on the end. Then on the horizontal section, cut the top layer to form a gutter-type trough to eat out of. It can be attached to a tree or you can do a free-standing post by using a T-post. Some people use a small skinny structure that has a roof shelter over it.
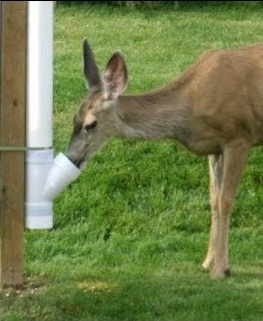
- Barrel or 5-gallon bucket design: Obtain a 5-gallon bucket or similarly sized barrel with a hole at the bottom. Attach piping to the hole in the bucket. This design allows for a large holding capacity.
- Feeding spout: Secure a variety of trays to the piping.
You may need to try out some different options to determine which works best for your needs.
Tripod
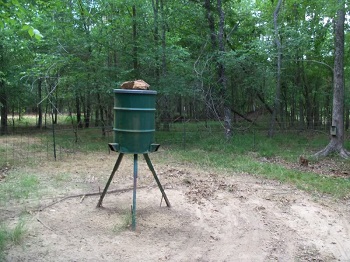
For grain feeders, you can make a homemade version of a tripod deer feeder. Take the following steps to achieve this:
- Obtain a large barrel with a lid on top that is removable for easy refilling.
- Attach three poles as legs for broad support at the base like a tripod.
- Cut a hole at the bottom of the barrel and place some form of a feeding spout over the hole.
You can also upgrade it and have up to four different spouts to feed more deer.
Keep in mind that you will need a ladder and will need to be physically capable of refilling the barrel bag by bag until you have the amount you want in your feeder.
Alfalfa Feeder
This type of feeder is very similar to the table trough, but is specially designed to feed alfalfa. To build this type of feeder, do the following:
- Build a structure like a table trough.
- Ensure the structure features a sturdy cover.
- Build a series of beams out of the covering, spaced closely together and forming a “V” shape that will hold the alfalfa above the table.
As the deer pulls the alfalfa, the beams hold the rest in. And whatever spills out lands right on the table.

You also can build a variation on this with a 50-gallon barrel:
- Cut the middle of the barrel vertically: use one half of it to form a trough, and the other half as a roof.
- Set the two halves around 3 feet apart (creating the top and the base) using 2×4 wood beams as the structural support.
- Between the barrel halves, use a sturdy and thick pig fence style wire mesh forming a “V” shape.
- Lift the roof pipe to add the new feed and keep it dry.
To make an even simpler version, take a barrel and cut holes around it to allow the animals’ heads to access a pile of alfalfa piled inside of it. People use this design for goats and other animals, but you can also easily use it for deer, although bucks need bigger holes to get their heads inside.
Further Tips
There are many more tips that can help you succeed in attracting or bolstering deer populations in a given area.
Make Attractants as an Alternative or Additional Asset
If you find the options above too time-consuming or costly, then you might be interested in knowing that there are other even simpler attractants that you can use. You can also use these in conjunction with feeders to further ensure success.
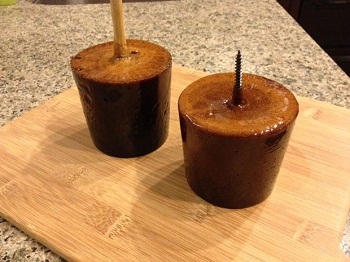
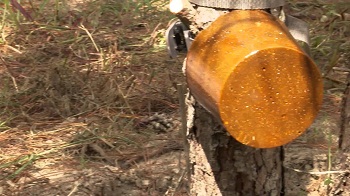
Perhaps the most popular option is a deer lick. Aside from alfalfa and similar feeds, there are a variety of attractants you can turn into licks or blocks. One common recipe uses molasses, deer corn, cornmeal, brown sugar, oils, and salt. There are several ways that you can form the lick, including:
- Mix and bake the ingredients, and then press them into a form of your choice to cool. As it cools, you can then place a large screw in it so when it hardens you can attach it to your setup and not have the animals carry it off.
- Make it into a hard candy. Boil sugar and butter. Then pour it into your form to harden with the stick or large screw, depending on how you want to fasten it.
- Make a deer cane using various sweet ingredients like sugars, Jell-O, and syrups. You can mold this into a block, liquid, mixed with dirt, or however you like.
You can also make variations on the base recipe, but it is important to ensure it is nutritionally appropriate for the deer and not harmful to any other populations.
Consider Options for Making Your DIY Project More Affordable
There are several ways that you can make your project more affordable, including:
- Start with a simple design you know you can get right, so as to minimize the use of materials.
- Ask people with experience for advice, so that you can avoid costly mistakes.
- Compare prices for materials.
- Choose resilient materials that you will not have to repair or replace often.
You may even have some success upcycling old materials from around your home or from a local junkyard.
Start With Easy Options
It is usually best to start out simple when approaching a new type of project. There will inevitably be mistakes and learning curves to contend with. As such, it is often best to start small with a simplistic design, so as to give yourself room to learn for the future. After that, you will be more successful in your approach to more complex projects.
Be Aware of Laws
It is important to keep in mind that some localities have laws about deer feeders and deer licks, as well as various outdoor structures, especially if you’re going to use them for hunting. Therefore, it is vital that you do your research before starting your project. Peruse a government website or reach out to the relevant local authority to gain the proper information.