From reel to fly, knots are an integral part of any fly fishing rig. And while learning to tie knots well takes some practice and attention to detail, most of the knots used in fly fishing are not too difficult and can be learned quickly.
At every junction in the fly line, there’s a special knot that has been proven over countless years by generations of anglers to be the best knot for the job.
So, to help your learn which knot to use in every situation, we’re going to walk you through every fly fishing knot you need to know starting with the reel and the backing, moving all the way to the fly line, leader, tippet, and fly.
Backing to Fly Reel
Let’s say you buy a brand new fly reel, good rod, and fly line, along with 150 yards of Dacron backing. To set up your new rig, start by securing the backing to the reel. And the knot to use is…
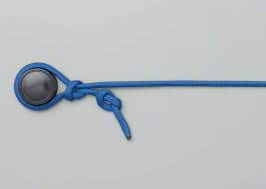
Arbor Knot
The arbor knot is the best one to use when loading any kind of line onto any type of reel. Tied using only two strategically placed overhand knots, it is a simple noose-style knot in which the harder you pull, the tighter it gets.
Fly Line to Backing
Once you’ve tied and wound on the backing to the reel, it’s time to tie your fly line to your backing with…
Albright Knot
Using the Albright knot, you can join any two lines together, even if they’re made of different materials and have greatly different diameters. It’s the perfect knot to join Dacron braided backing with a thick fly line.
The Albright knot maintains a very slim profile even when tied with thick lines, allowing it to easily slip through the line guides when you hook into a really strong fish that takes you into your backing.
Fly Line to Leader
With your fly line attached to your backing and wound onto the reel, next comes the leader. You have a few options for tying your leader to your fly line.
If your fly line has a normal straight end, the nail knot should be used to tie the leader directly to the fly line. But if your fly line has a welded loop at the end, you’ll need to attach your leader with a loop-to-loop connection.
Nail Knot
The nail knot is a very strong friction-style knot. The leader is wrapped around the soft fly line in coils then pulled tight. With this action, the leader grips and squeezes the fly line, creating a very strong connection without much bulk.
The nail knot got its name from the original use of a nail as a guide to thread the tag end through the coils. You can use a nail if you’d like, but a small tube or straw is a much better tool for the job.
Loop-to-loop Connection
The loop-to-loop connection is useful when connecting two lines that you may want to separate in the future. It’s a very strong leader-to-line connection but allows you to change your leader without having to retie any knots.
To create a loop-to-loop connection, your fly line must have a welded loop in place, and your leader must have a loop tied at the butt end. Knotless tapered leaders often come with pre-tied loops. But if not, use a perfection loop — one of the quickest and easiest loop knots to tie.
With your two loops ready, slip the loop on the leader through the loop on the fly line. Then, thread the tag end of the leader through the loop on the leader and pull tight.
To disconnect the loop-to-loop connection, slide or break the loops apart and pull the tag end of the leader back through the loop on the leader. Changing leaders couldn’t be easier.
Leader to Tippet
With your leader tied to your fly line, you’re almost ready to fish! All that’s left is to tie on your fly and start casting. But what if you need to tie more tippet to the end of your leader before you tie on your fly?
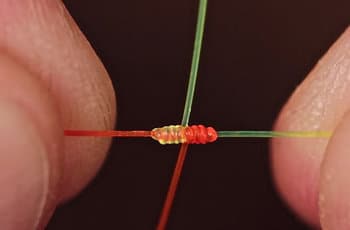
Blood Knot
The blood knot is used to tie any two lines together that have a similar diameter, such as tying 6X tippet to 5X tippet. If there is too great of a size difference, the blood knot won’t seat properly and will likely fail.
Tying the blood knot with very light line can be quite a chore, but it can be done with good lighting and lots of practice. But if you want a knot that’s slightly easier to tie, give the surgeons knot a try.
Surgeons, Double Surgeons, or Triple Surgeons Knot
The surgeon’s knot, better known in the fly fishing community as the double surgeon’s knot, is a very useful line-to-line knot that can be used to join lines of the same size as well as lines of relatively unequal size.
In essence, the surgeon’s knot is a double overhand knot tied with the ends of two lines — very strong and very easy to tie.
For a triple surgeon’s knot, simply use an extra overhand knot to make it even stronger though slightly bulkier.
Tippet to Fly
Now we’ve reached the business end of the line. It’s time to tie on a fly and start casting.
We’ll leave you with three tippet-to-fly knots to choose from. Use whichever gives you the most confidence.
Clinch Knot
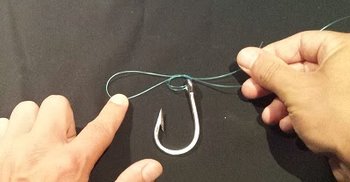
The clinch knot is one of the most basic and widely known fishing knots in existence. Simply thread the line through the eye of the hook, wrap the tag end around the running line, thread the tag end back through the loop, and pull tight.
The improved clinch knot starts the same way but has an extra finishing touch that increases the knots strength and keeps the knot from slipping loose before drawing all the way tight — a common issue with the standard clinch knot.
Orvis Knot
Once learned, the Orvis knot is very quick to tie and cinches up tight without worry of the line slipping. Especially great for tying on small flies, it creates a small head that doesn’t interfere with small dry flies or nymphs.
Non-Slip Mono Loop
Using a loop knot allows your fly to float through the water with as little influence from the line as possible.
The non-slip mono loop knot is incredibly strong, easy to tie, and ends with the tag end pointed towards the hook which reduces the annoyance of weeds getting caught on the knot.
Tips on Making Stronger Knots
The knots we outlined here covers 99% of rigging you may encounter while fly fishing. Learn them, commit them to memory, and practice until you can tie them with your eyes closed.
To help you tie even better knots, here are a few tips that will make your knots stronger and less likely to fail:
- Wet your knots before tightening. Use saliva or dip the knot in the river. Wetting the knot reduces friction between the strands of line, allowing the coils to seat better for a stronger knot.
- Cinch your knots quickly. Once you get the knot tied loosely and in position, pull the knot tight quickly in one smooth motion. This also helps the knot seat properly.
- Always test your knots. After you finish tying one, give it a good, strong tug to make sure it isn’t coming loose. You don’t want to lose a fish of a lifetime from a poorly tied knot.

