
If you are thinking about buying a cellular trail cam, you need to have a good understanding of cellular plan costs for trail cameras so that you can plan accordingly.
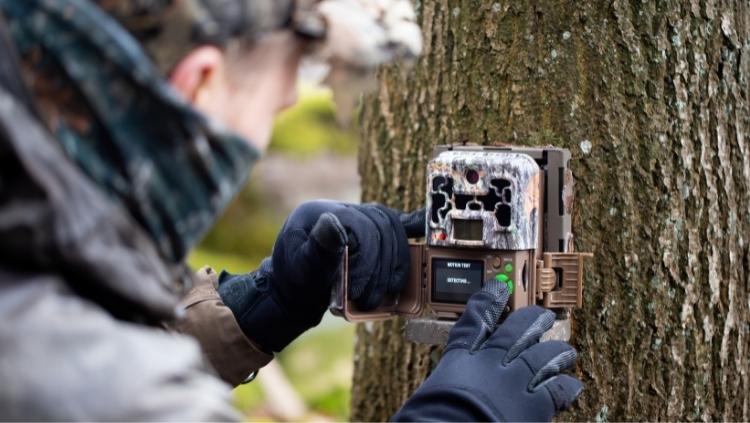
Many types of trail cameras are available from various manufacturers, many of which now have built-in cellular modems. If you invest in a cellular-enabled trail cam and pay for a cell plan, you can have pictures from the camera sent directly to your phone.
A basic cellular data plan for a trail camera costs an average of $10 per month. Some trail cam companies offer subscriptions for $5-$20/month for 100 to unlimited low-res thumbnails. For high-res photos, a data plan from a major network like Verizon, AT&T, or T-Mobile costs between $10-$100/month.
Whether you are an avid hunter or just want to get a better look at the wildlife on your property, a trail camera is one of the best tools to get. Here’s what you need to know about how much a cell plan costs for a trail cam.
How Do Cellular Data Plans for Trail Cams Work?
If you want easy access to your trail-cam pictures, you need a cellular plan covering your cameras.
In some cases, you can choose to purchase a plan from the manufacturer of your trail cam. These generally sell for a fixed price per month, quarter, or year.
That subscription and the level you select will determine the maximum number of images which can be transmitted from the trail cam to your phone.
Trail cam photos are generally transmitted via a cloud service and app provided by the manufacturer.
Still, it’s important to remember that these third-party options often use the same cell towers as the biggest cell network providers such as Verizon, T-Mobile, and AT&T.
Some manufacturers lock the hardware down so that you have to purchase their data plans for the cellular functionality to work. Others leave it open so you have options.
You Pay Based on How Many Images are Sent
Data only cellular plans generally charge by the amount of data transmitted. The more data, the more money it costs. For a trail camera, that means the more images you want to transfer, and the higher the resolution of those images, the more data you need in your plan.
For reference, a high-res photo from a high-end 16 MP trail camera is about 10 MB in size. So 50 GB translates to more than 500 photos.
Most trail cams will transmit compressed images with much smaller file sizes, often around 100 kb per image. In that case, 50 GB could be thousands of photos.
Most cheap plans (under $20/month) from the trail camera companies only transmit thumbnails. These can be blurry or hard to see, but are usually sufficient to identify a big game animal.
If you want high-res photos or video on your phone, you gotta pay more. Many trail cam companies don’t even offer this as an option while others may charge a pretty penny. If you want this feature, it might be best to go with one of the big networks.
But first you will want to ensure it is even possible with your camera through the trail cam company’s app or a third party service.
Separate SIM Cards for Each Device
You must have a separate device and SIM card on your plan for each trail cam you have. You can’t use the same SIM for multiple trail cams, whether you purchase coverage through a trail cam manufacturer or directly through your cell phone provider.
Depending on the carrier, this might mean multiple plans are also required, one plan per SIM. Other companies, such as Spypoint, will allow you to have one plan that covers multiple SIM cards and cameras.
Bundled Plans Reduce Costs
If you have four different trail cams and want to receive pictures from each of them, you may need four separate data plans to accommodate the cameras.
It may be easier to keep track of all of your plans if you purchase cell coverage directly from one provider. This is especially true if your cameras are not all the same brand.
You can often add a trail cam cell plan to your monthly phone bundle if you use one of the major providers for coverage. This is often referred to as a data only device add-on and will come at an incremental cost increase.
How Much Does a Cellular Trail Camera Cost per Month?
Trail cam data plans range from free to about $100 per month. The average cost of a basic trail cam data plan is $10 per month. However, the cost varies widely among coverage providers and available plans.
The number of pictures you receive each month and the quality of those photos varies drastically depending upon your cell plan.
For low-resolution thumbnail images only, an inexpensive plan provided by a manufacturer may only cost $5 or $10 per month. Whereas a plan from a major cellular network provider that allows full resolution image transmission (and more than just a couple of images per month) could cost up to $100 per month.
When it comes to the cellular plan cost for trail cameras, the price of paying for coverage from your trail cam manufacturer can be comparable to buying coverage from your regular cell phone provider. Though, it may be easier to set up coverage through the trail cam manufacturer.
Trail cam companies often offer free plans that supply you with a few low-resolution photos each month, which could be a good option to get started. However, avid deer hunters who rely on trail cameras to track the movements of large bucks may be willing to pay up to $1,000 annually for unlimited high-quality photos.
Do Cellular Trail Cameras Require a Subscription?
Data plans for trail cameras work similarly to cell phone plans, except that they are for data only (no phone calls or SMS). Pricing is almost always defined by the month.
Depending on the carrier or if you buy direct from a trail cam company, you may also be able to subscribe to a cellular data plan for your trail cam quarterly or yearly.
It may be slightly more cost-efficient to buy a quarterly or annual plan. However, you may not want to pay for coverage throughout the year if you only use a trail camera during deer season.
Not all carriers require a contract. Month-to-month subscriptions are an option.
To choose which type of subscription is best for you, determine your individual needs. If you want to monitor the trails throughout the year and can afford the upfront payment for a yearly subscription, you may prefer to pay annually. On the other hand, if you can’t afford a large annual payment or only want to use your trail camera for a few months out of the year, you may opt for a quarterly or monthly subscription.
If you pay for an annual plan, you may not be able to change to a higher package until your subscription is ready for renewal. On the other hand, you may be able to change packages every month to accommodate varying needs throughout the year if you purchase a month-to-month subscription.
Price of Data Plans Through Trail Cam Companies
There are many different trail camera companies who offer data plans directly for their cellular-enabled cameras. For example, Bushnell charges as much as $1 per full-resolution image. Tactacam only transmits thumbnails with their plans, which keeps their plans pretty cheap as long as you don’t get too many photos. Here are some examples.
Covert by Feradyne

Covert trail cam data plans start at $5 per month for 100 images and go up to $20 for unlimited images. Additional cameras can be added to the same plan for $5 per month. Quarterly and annual plans are also available as well as international and object recognition add-ons.
Spypoint
Spypoint claims to be one of the biggest trail camera companies and they have a wide array of impressive products. As of 2022, they offer the four main data plans. Here are the monthly fees:
- Free: 100 photos = Free
- Basic: 250 photos = $5
- Standard: 1000 photos = $10
- Premium: Unlimited photos = $15
They also offer annual plan discounts and an Insiders Club discount with some additional perks.
Spypoint also provides full-resolution HD photos upon request. You can pay a flat fee of $5 for 50 full-HD photos to your phone.
Tactacam
Tactacam makes the Reveal cellular trail camera series and at press time their data plans are priced as follows:
- Starter: 250 photos = $5
- Intermediate: 500 photos = $8
- Pro: Unlimited photos = $13
You can add more cameras for a small discount.
Cost of Trail Cam Data Plans From Major Cellular Networks
Outside of the trail cam company data plan options, there are three major cell phone providers in the US that you can choose from.
While you may be able to find a smaller provider, coverage and compatibility could be questionable. It is usually best to purchase a plan from Verizon, AT&T, or T-Mobile. Even trail cam manufacturer data plans generally piggyback on the these major cell phone providers.
Verizon and AT&T are the most commonly supported networks by cellular-enabled trail cameras. Just be sure and confirm your camera’s compatibility with these networks. In most cases, a camera is only compatible with one of these networks, not all.
You may be overwhelmed by choosing which provider to work with. Each provider has its own advantages, but you can expect the following packages and coverage.
Don’t count on having a signal with any carrier in remote backcountry areas in the Mountain West, however.
Verizon
Estimated cost: $10-$100 per month
![]()
Verizon offers various data only plans that are prepaid. As of press time, these start at $40/month for 5 GB of data (promo for $10).
WiFi hotspot only plans are slightly cheaper, which could be compatible with even non-cellular (but WiFi enabled) trail cams.
If you’re already a Verizon customer, shared plans may allow you to add a data only device for a $10 per month access fee on top of your existing plan. Or they may offer you up to 10 GB of data at no charge.
If necessary, you can also purchase a booster package to strengthen the signal to your trail camera so that you still have plenty of data to use on your phone for other purposes.
Verizon cell towers provide coverage to 99% of America, so you can be confident that your trail cam will get a strong signal when you have a trail cam cell plan from this provider.
AT&T
Estimated cost: $20-$60 per month
![]()
AT&T data plans have both unlimited and mobile share options when you have an existing cell phone plan with them. These generally offer the greatest savings.
They also offer prepaid and recurring data only plans (AT&T DataConnect) that start at $20 per month.
If your trail cam is compatible (e.g., Covert Scouting Cameras), a great option with AT&T might be an IoT data plan. IoT data only plans start at $3/month and go up to $60/month. You also need to buy the SIM card for $2, which is not uncommon with any carrier.
The company also offers unlimited data or a high-speed 8 GB plan for people who don’t want unlimited access. You can easily adapt your plan to include multiple devices. The cost varies based on how much data you think you’ll use and your device compatibility, which might dictate the type of plan.
AT&T has excellent coverage in all 50 states. Outside of the backcountry, you will rarely have to worry about your trail cameras not receiving a signal.
T-Mobile
Estimated cost: $5-$50 per month
![]()
T-Mobile offers data only plans starting at $5/month for just 500MB of data, which may or may not be sufficient for transmitting a whole lot of photos from your trail cam. These plans scale up to $50/month for 50 GB, which converts to a LOT of thumbnails or even full-res photos.
You can choose a prepaid plan that offers anywhere from 2 GB to 22 GB of data. If you prefer to have a pay-as-you-go plan, T-Mobile also offers various unlimited plans.
Then you can add a data only device to a traditional T-Mobile cell phone plan for between $10 and $20 per month.
The nationwide cell provider Sprint falls under the umbrella of T-Mobile.
Are Cellular Trail Cameras Worth the Cost?
To know if the cost of a trail camera is worth it, you need to know how often you will use it and plan accordingly.
The combined cost of your data plan and the trail camera varies widely depending upon the package and camera you choose, but it can easily add up to a significant expense. You may wonder if the expense of a trail camera is worth it.
If you just want to keep an eye on what happens on your property, you can select a low-cost or even free data plan that only provides you with a few low-res images each month. This will allow you to identify the types of wildlife on your property and catch any trespassers who come near the camera. It’s a more cost-efficient solution that gives peace of mind.
However, if you are an avid hunter, you may want to select a more expensive cellular data plan that will provide you with unlimited pictures each month. A better plan allows you to see more of what happens in front of your lens. You’ll better understand which deer you want to track during hunting season.
If you use the camera throughout the year, it can be an invaluable tool worth the price. If it is a tool that you only want for peace of mind or to watch the wildlife that passes through your property occasionally, a trail cam may not be worth the price for you.
Why is a Cellular Plan for Trail Cameras Beneficial?
The primary benefit of purchasing a cell plan for your trail cameras is that every time your trail cam detects movement, it takes a picture and sends it directly to your phone so that you are aware of what is happening on your property or at your hunting spot. It also helps store all the photos your camera takes in a safe location.
Trail camera data plans also offer the following benefits:
- Customized plans for individual needs such as how many cameras you own and how often you plan to use them.
- Access to your photos from anywhere, provided you have a cell signal. Regardless of how far away you are from your trail camera, you can use a mobile app or log in on the website to see all of your trail pictures. Not only does this feature make it easy to share your photos with friends, but it also helps you stay aware of what happens on your property at all times.
- A wide variety of helpful features like push alerts, image filtering, and built-in AI capabilities that help identify what’s in the image.
- Cloud-based storage that keeps your photos secure and accessible even if something happens to your phone or trail cam.
Once you have chosen a trail cam, you can select from a wide range of data plans to find one that meets your needs and won’t blow your budget. Consider your coverage options carefully and see which data plan will best help you accomplish your trail cam goals, whether you want to hunt or just observe the wildlife on your property.
A trail camera is an excellent investment if you want to know what types of wildlife frequent your property. Now you are more aware of cellular plan costs for trail cameras so that you can choose the one that best meets your needs and budget.